PHOTOS OF NINIGRET

 |
 |
 |
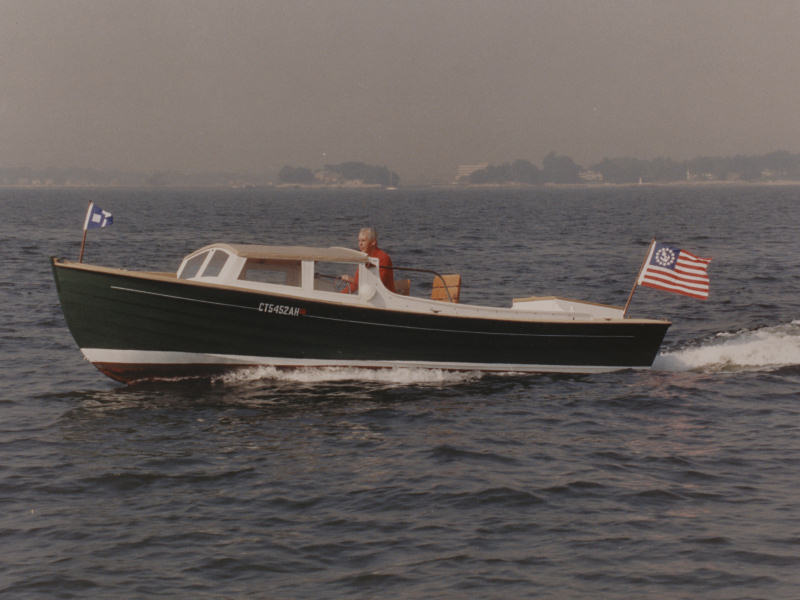
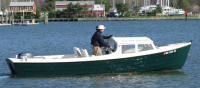
John Atkin at the helm of the original Ninigret. |
John and Pat Atkin aboard Ninigret in October, 1987. |
Ly-Ja-Jan was built |
 |
 |
 |
by Sal Balsamo of |
Northford, Connecticut |
during 1998 and 1999. |
 |
 |
 |
She was launched in 2000. |
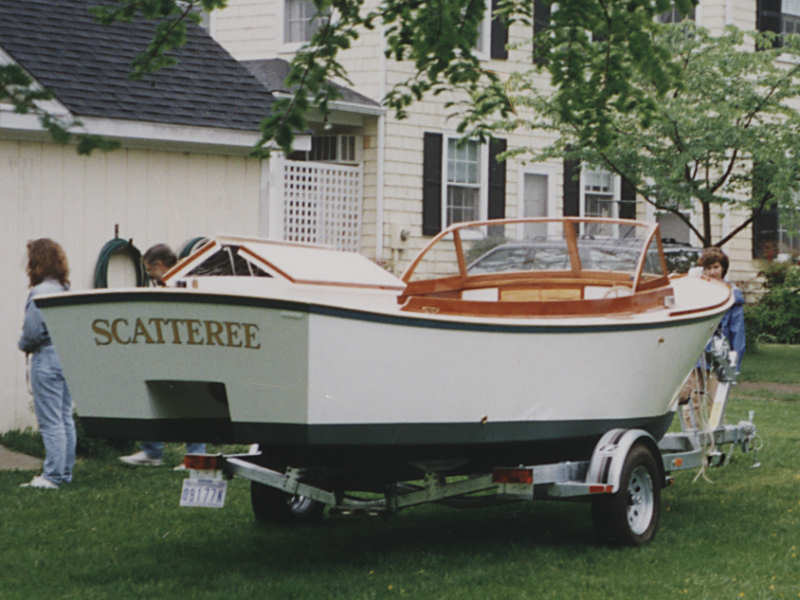
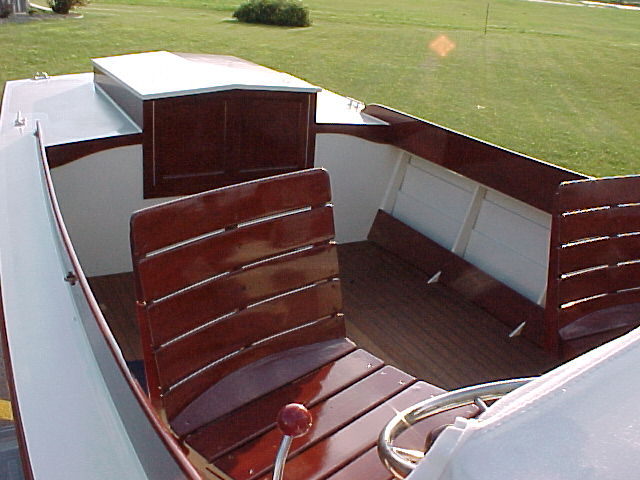
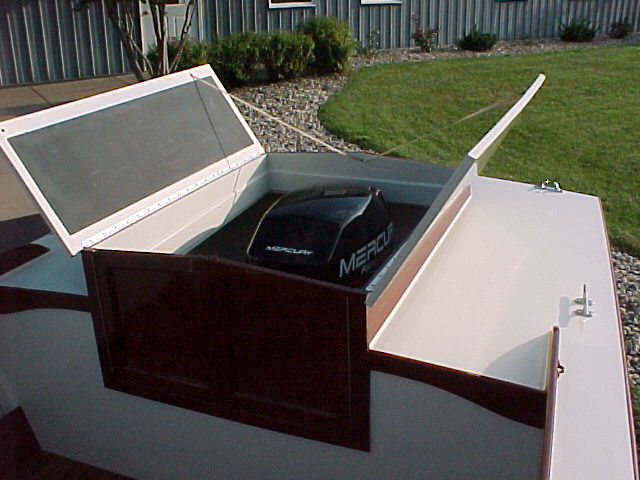
Scatteree was |
launched in 1995. |
 |
 |
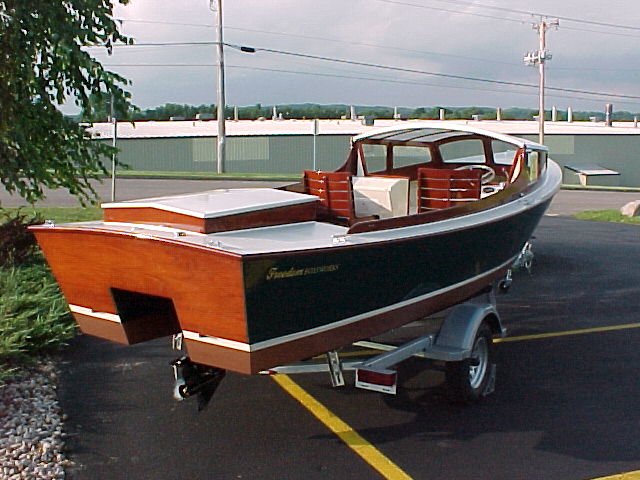 |
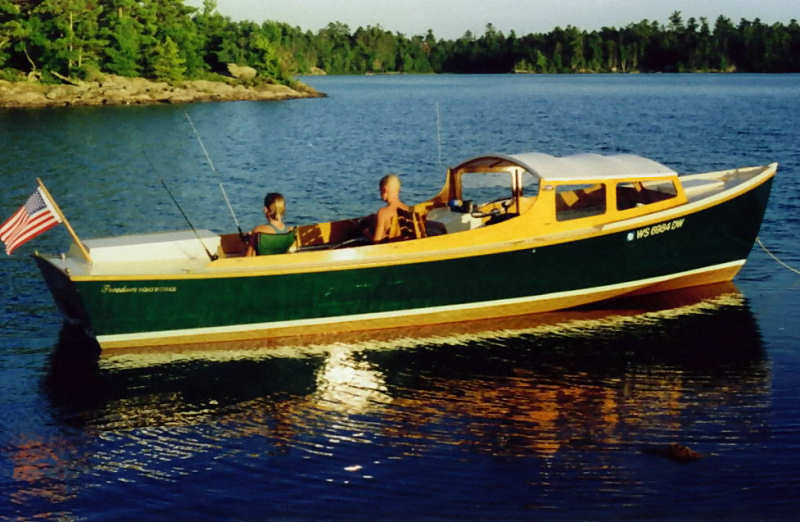
These are two of several |
gold plater Ninigrets built by |
Tony Bries of |
 |
 |
 |
Freedom Boatworks |
in Baraboo, Wisconsin. |
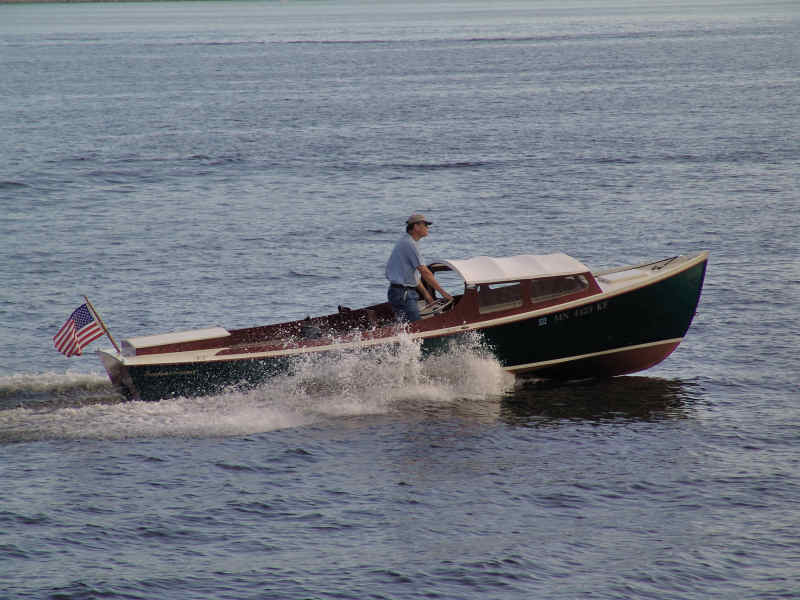
Jeff Ward's Freedom Boatworks Ninigret, Fair Isle. |
 |
 |
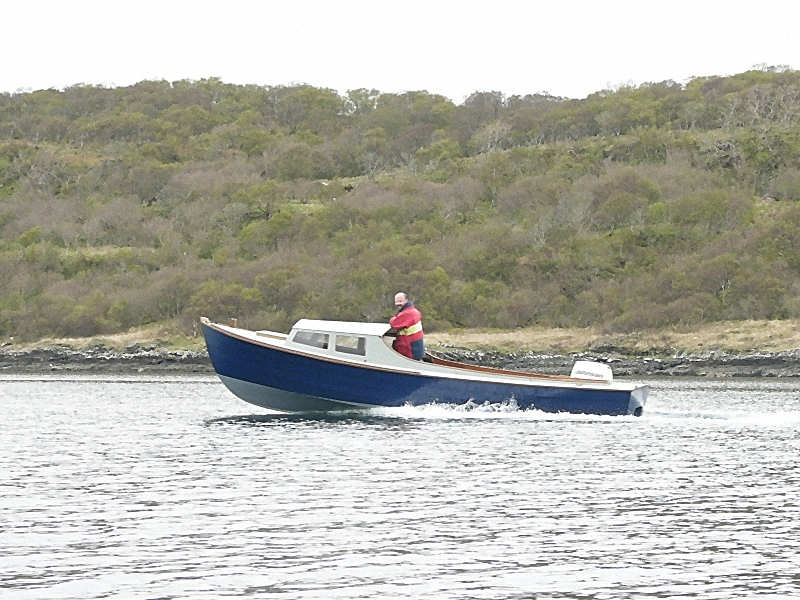 |
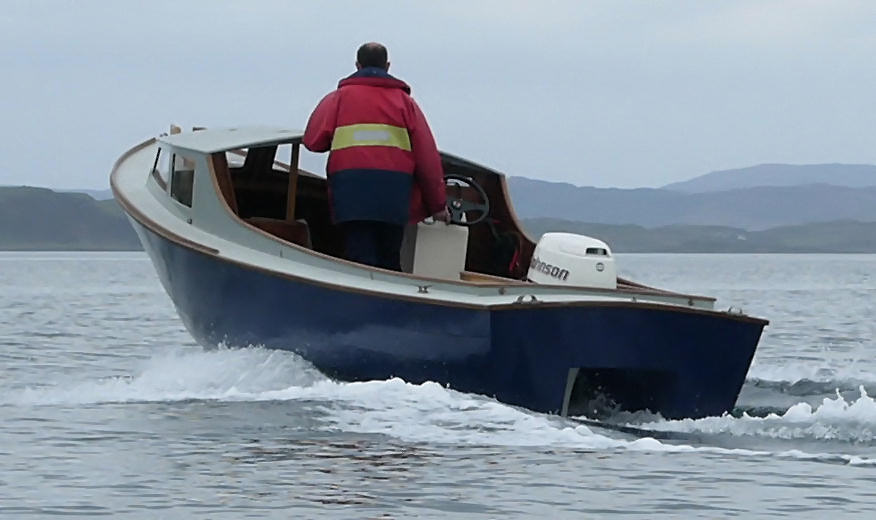
Sirius |
was built by Viking Boats of |
Ulapool, Scotland in 2005. |
 |
 |
 |
Sirius did 27 knots on trials. |
Jim Robinson's |
Midnight Run. |
 |
 |
 |
Midnight Run. |
Midnight Run. |
Midnight Run. |
 |
||
Midnight Run. |
||
 |
 |
 |
Schleiff Boatworks launched a Ninigret in April, 2009 for use on
northern Chesapeake Bay. |
Roeboats of Ballydehob, Cork launched this Ninigret in September, 2009. She was picked as a WoodenBoat "Boat of the Week" |
Livvy Loo was built by Morris Island Boatworks for
Jack Budak and launched Oct. 8, 2011. (slideshow) |
 |
 |
|
Livvy Loo won first place in the outboard motor |
class at the 2011 Georgetown Wooden Boat Show. |
|
 |
 |
 |
Pat Atkin and Bill Boyd posing with his Ninigret at the Woodenboat show 2014 |
||
 |
 |
 |
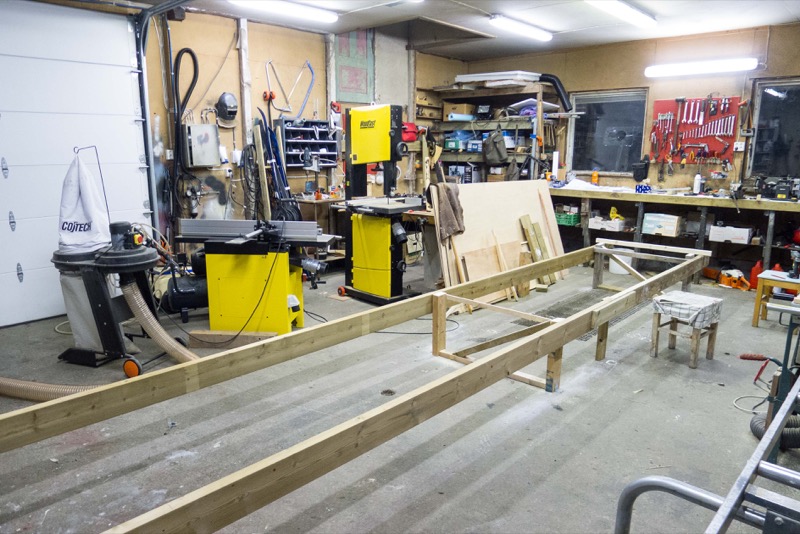
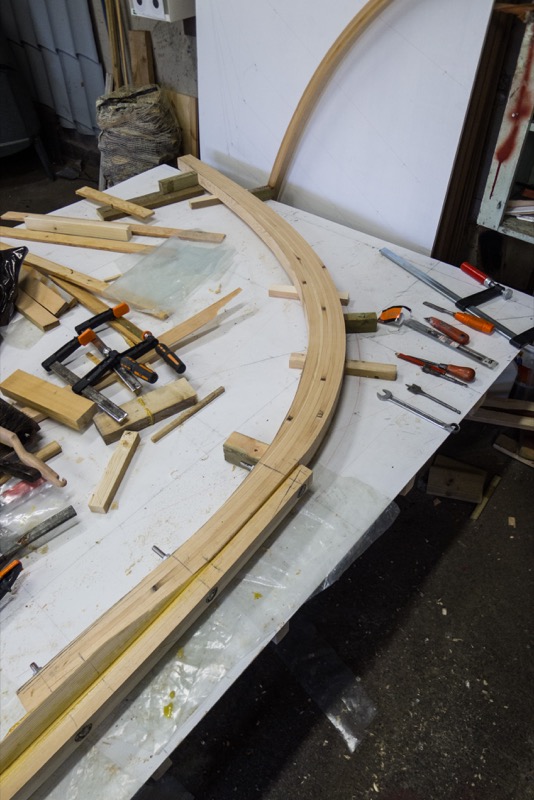
Roar Arne Velle, from Fosen, Norway has worked on lofting a Ninigret. |
He bought the plans back in 2012, and did not get a chance to start building the boat until 2014. |
He has had to consult with a local boat-builder to get the proper tools and timber. They will provide him with first class pine wood for the interior. The veneer is gabon/occume. |
 |
 |
 |
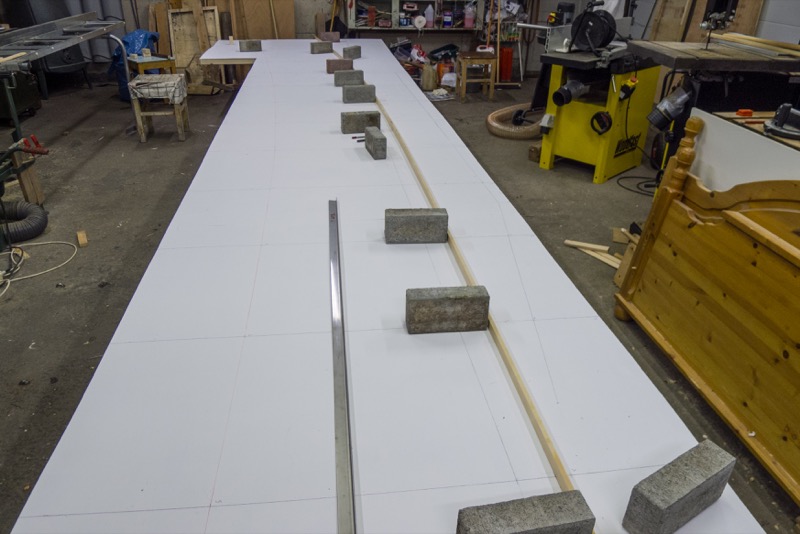
He will need a
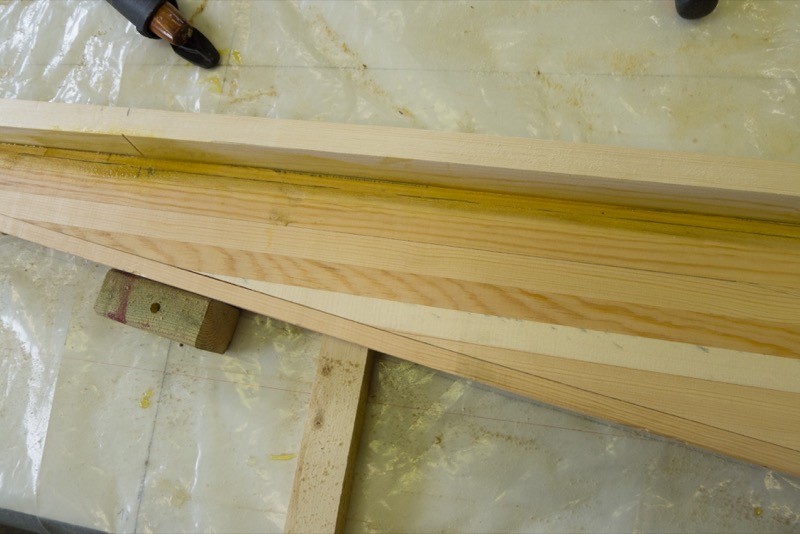
sheet of 13mm 120x240cm, two sheets of 12mm, and about 15 sheets of 9mm 120x240cm. Because he is using pine, he is going tohave to use 18-19mm instead of 15mm oak in side and bottom. |
The keel and bow and outer bow is laminated using epoxy. |
|
 |
 |
 |
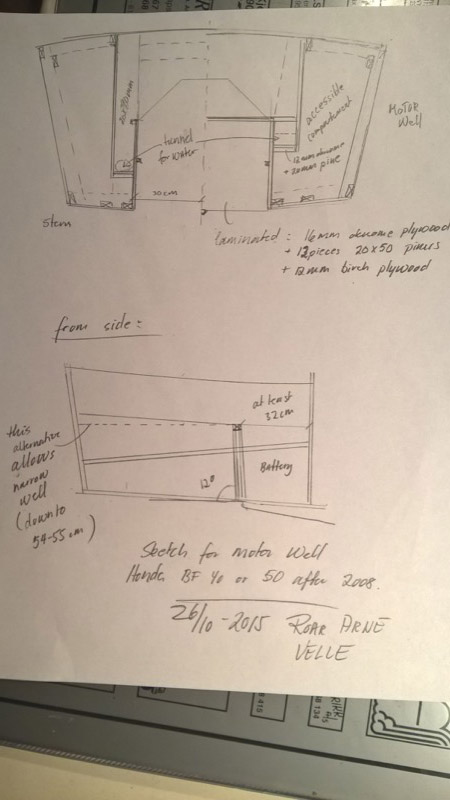
One question that arose was the motor selection. The choice needs to be made before constructing the motorwell. After an intense search, the decision became easy. The Honda 40 and 50 are the best choices, as they are small, lightweight and fast. For this project a Honda BF50 has been purchased. |
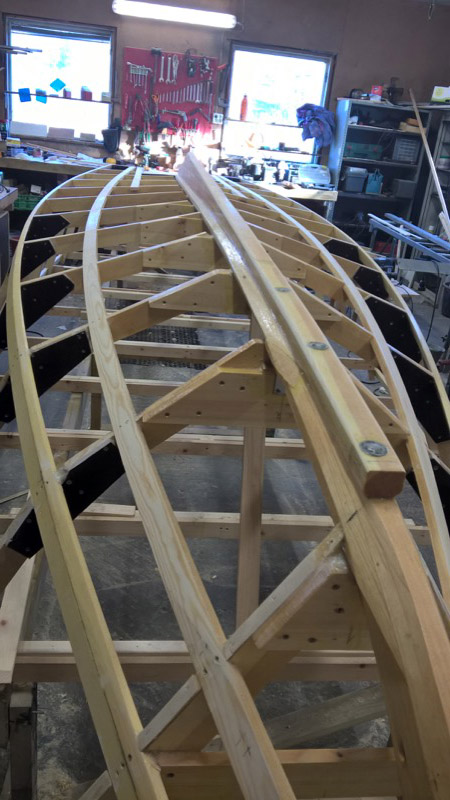
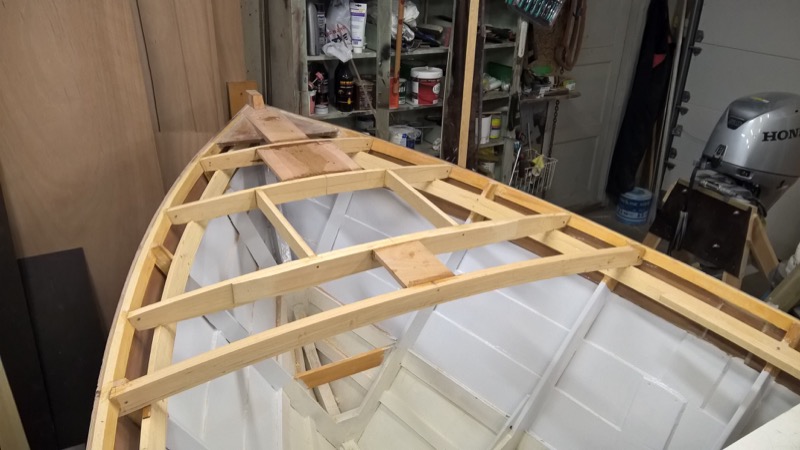
Difficulties so far: In the forefoot, the stem. The longitudal stringers have not been steamed (17-18mm thick and 4.5 to 6cm wide pine) . The
front 2.5 meters should be steamed to ease the process. One stringer was cracked, but fixed. |
|
 |
 |
 |
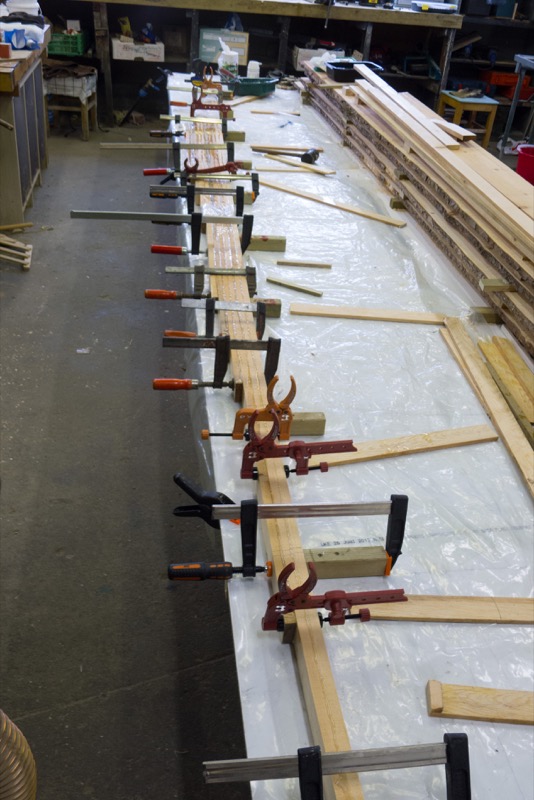
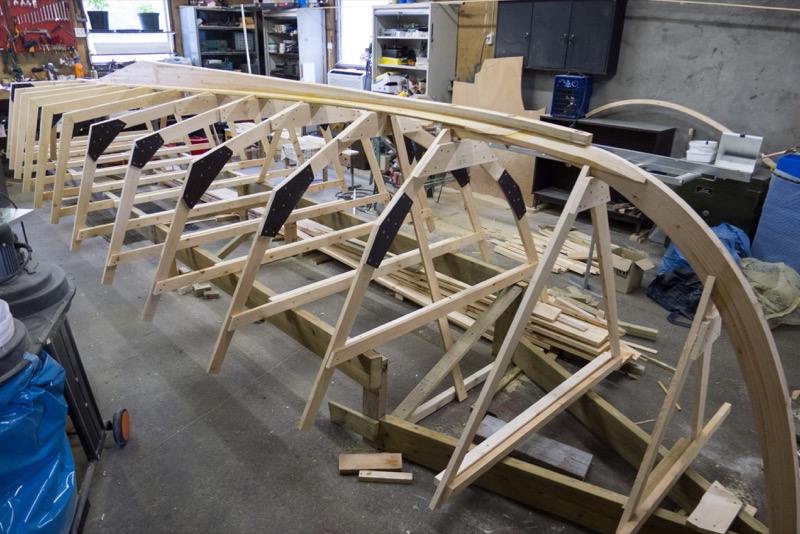
Waiting for epoxy to cure demands patience. |
All gluing is done with newly sanded tree, washed with red spirit , treated with unthickened epoxy first and then with thickening fibers. Use moderate pressure. |
|
 |
 |
 |
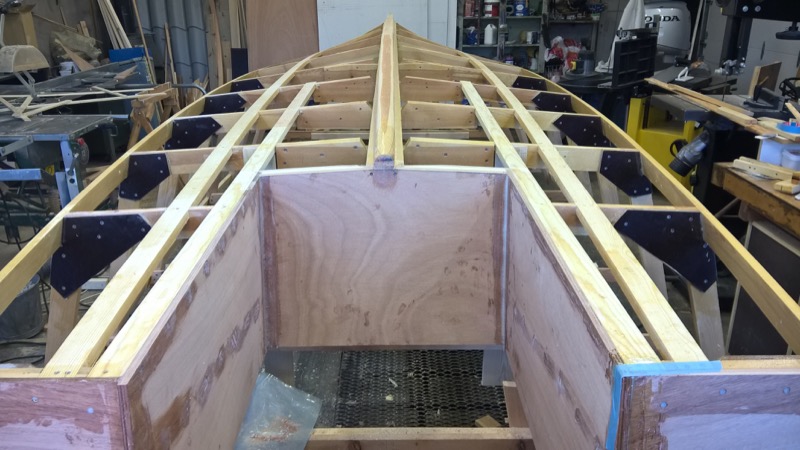
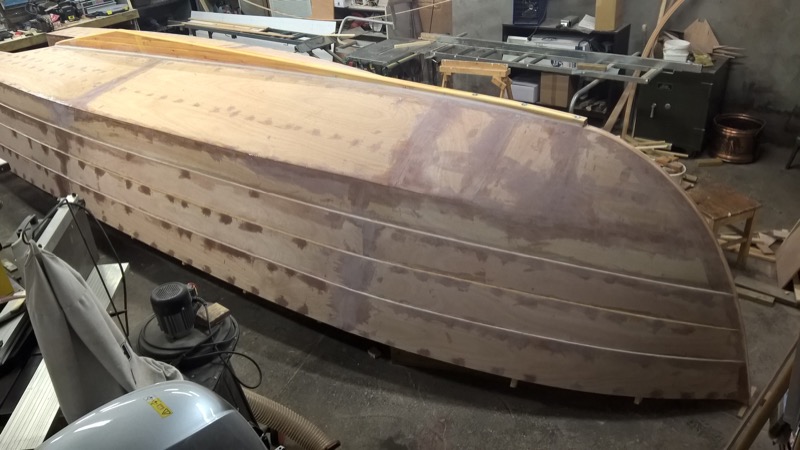
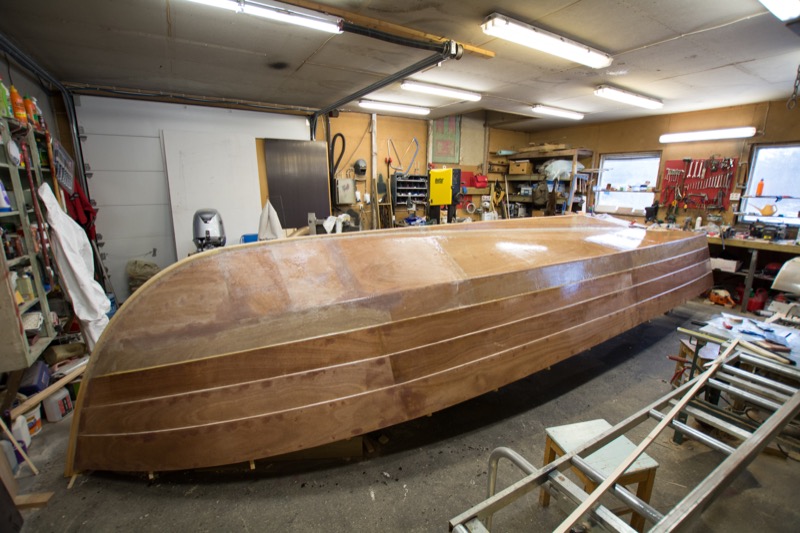
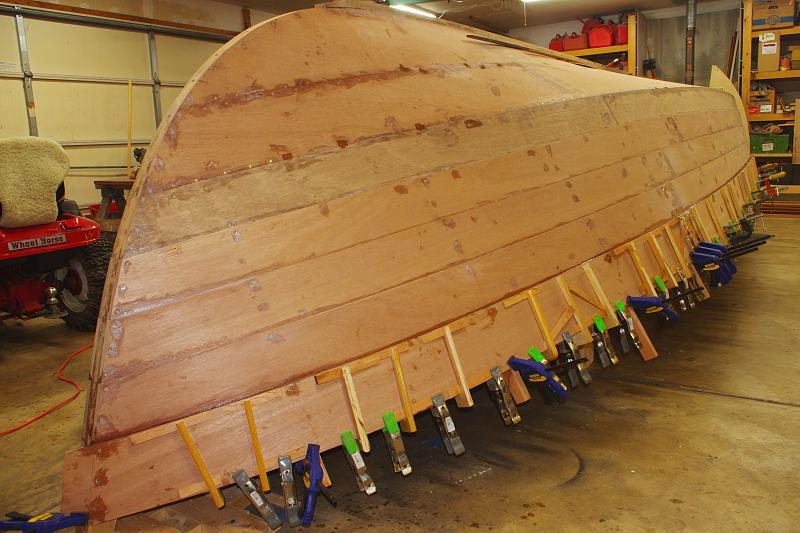
Here is the boat all planked up |
Roar ended up using 7.5 sheets of 9mm plywood for this process |
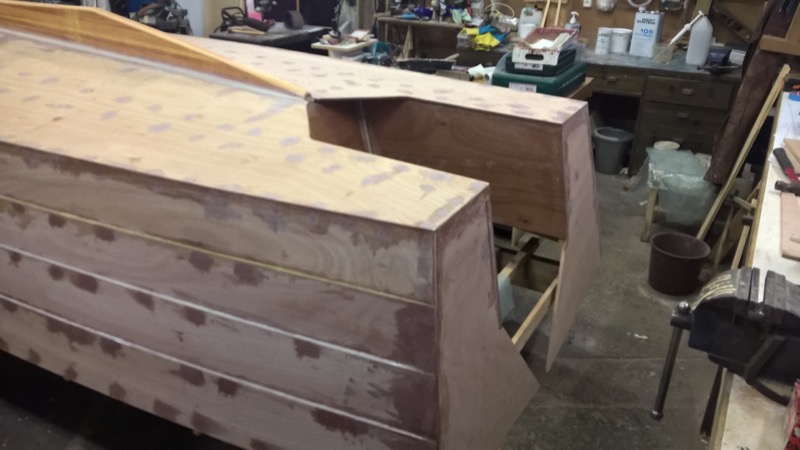
Some of Roar's personal notes on the motor well to fit the modern motor he is going to use. |
A letter from the builder...
Hello Pat,
The new boat, Ninigret, shall be a day cruiser running at about 17 knots, and with less sound and a little better accomodation. I am building Ninigret with little more shelter, including what we call: Stall -an open back, top roof and front window. Not too much, and not heavy, but just enough shelter when the weather is less friendly. The speed will take us north and south to the most beautiful coast in the world, - fro Hitra/Smøla to Sandnessjøen/Bodø Norway. We want to fish and sometimes do more than a daytrip. My plan is to include a stove. Wait and see!
I am almost 65, have studied natural science, practised as teacher, farmer and in the headquarter of Norwegian YMCA scouts.
Yours |
||
 |
 |
|
The outer skin is sanded and washed. The three upper strakes got 3-4 layers of epoxy. The bottom and the first strike received a 450g biaxial mat in the front and two 200g vowen mats were it is not curving so much - all set in west epoxy to strengthen the boat bottom against grounding. |
There is still some sanding and puttywork before fastening the metal at the keel and the bottom pre paint. Then the hull can be flipped. It is amazing that all the work is done singlehanded! |
|
 |
 |
 |
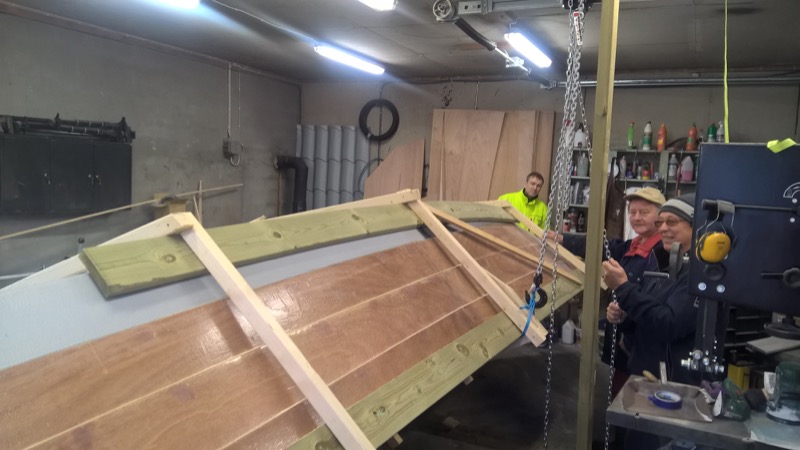
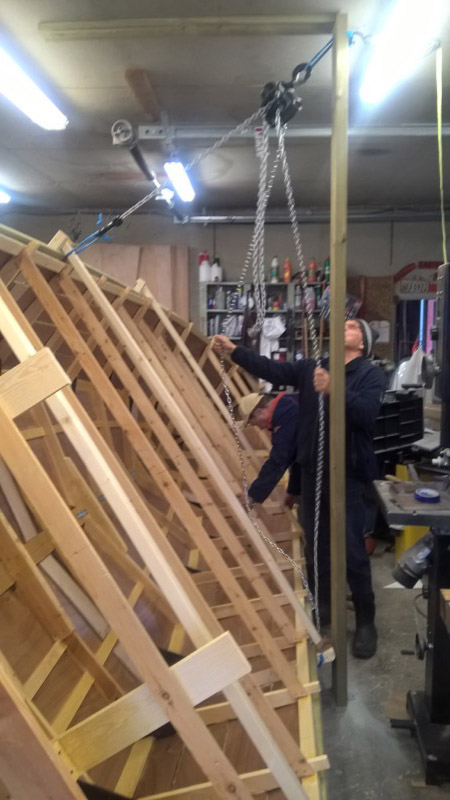
Rotating the boat right-side-up. |
The bottom paint details: First 400g/m2 or 450g biaxial/m2 glass mat set in epoxy at the bottom and first strake. After that Hempel vinyl primer before ordinary antifouling, (no copper boot here). The three upper strakes have received putty in the screw holes (900-many removed after curing) and at the plywood edges, thereafter three to four layers of west epoxy, - later on two component epifanes polyurethane. |
|
 |
 |
 |
Roar reports that the process was "Easy system, no fuss, no heavy lifting, just easy." He used a chain tackle and fastened tree boards around the hull for protection and to fasten the chain near the ballance point. |
Work continues on this project, mostly painting. |
|
 |
 |
 |
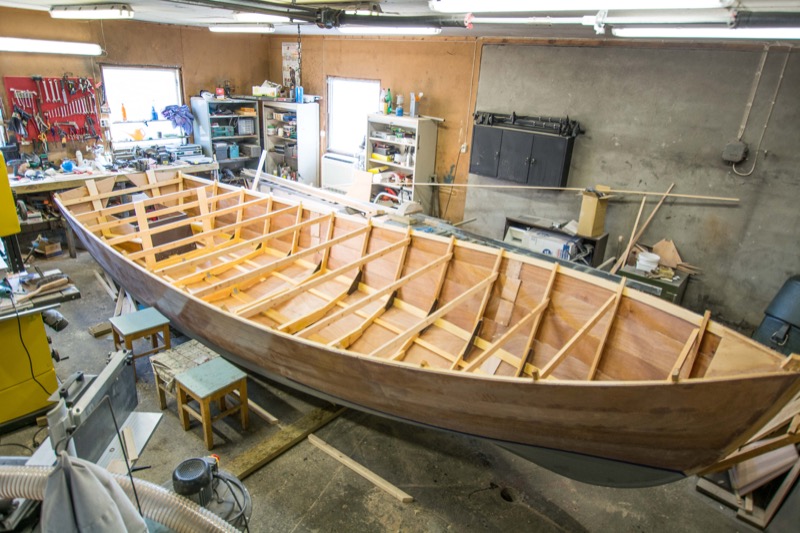
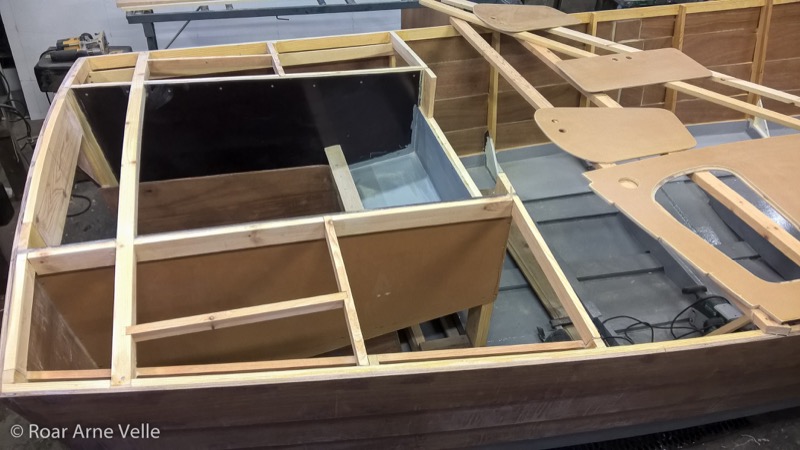
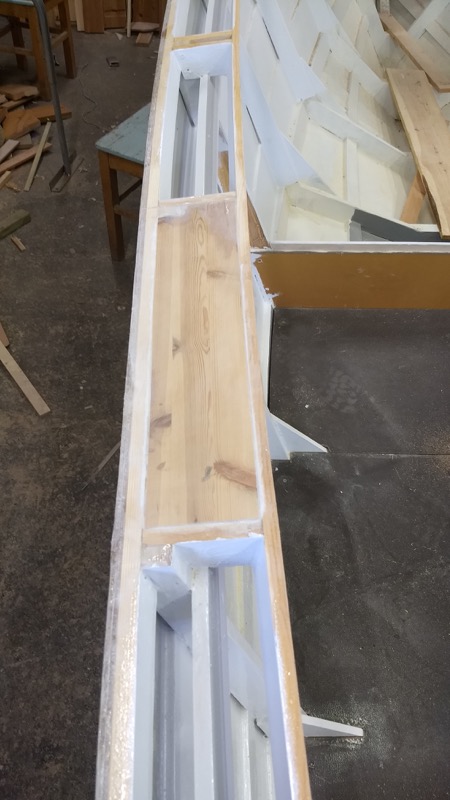
After a bit of a hiatus, Roar is back working on his Ninigret. |
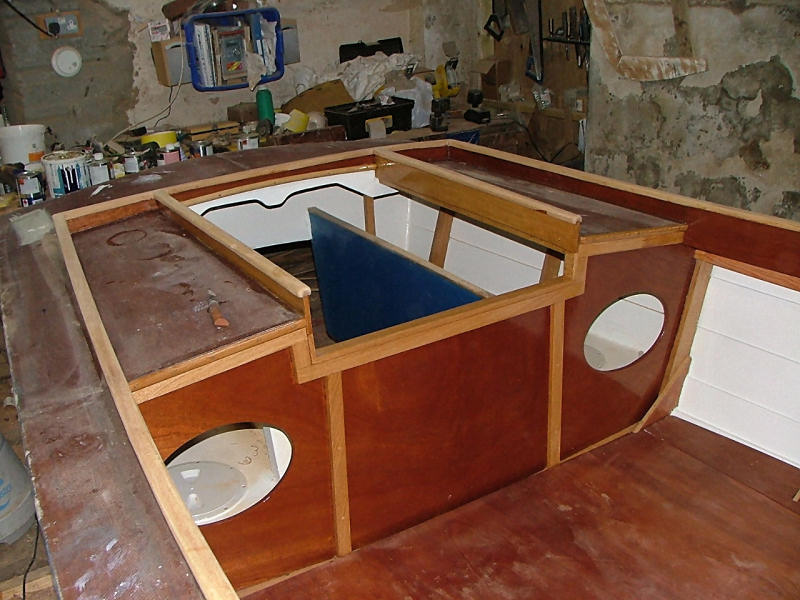
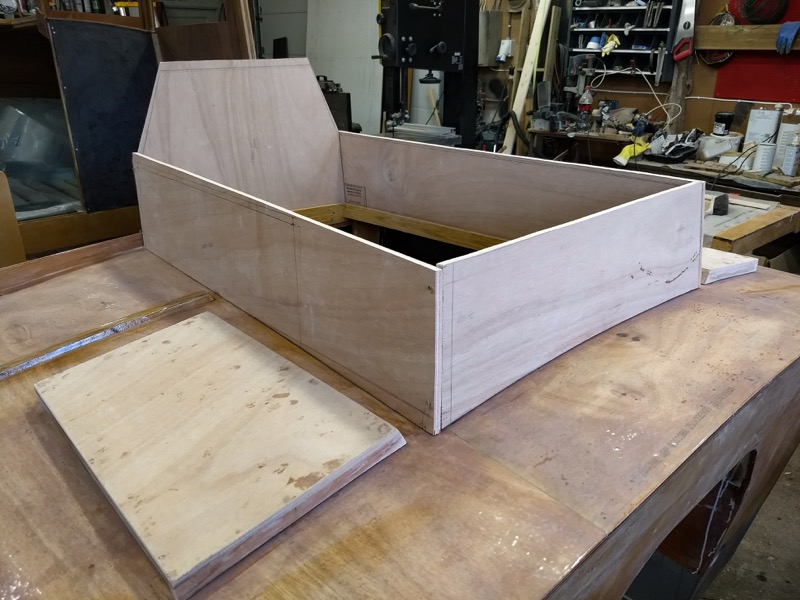
Here is the motorwell before the deck is added. Roar has limited the wet area to 80cm |
Detail of the construction of the ongitude stringers. Roar had to split and laminate where they curved the most. |
 |
 |
 |
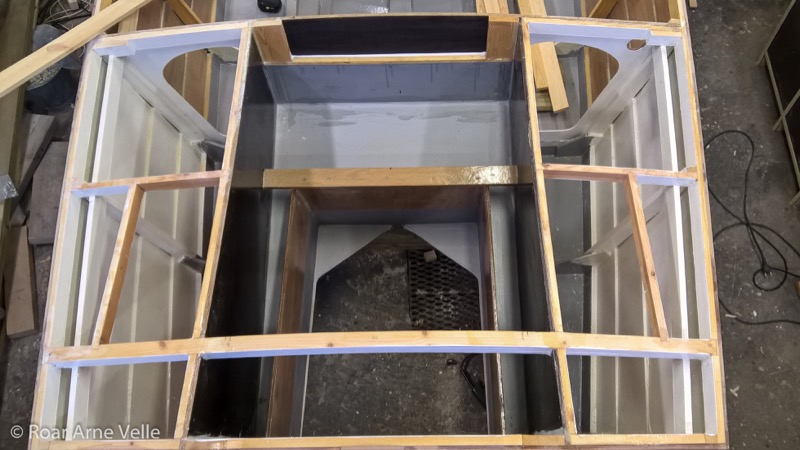
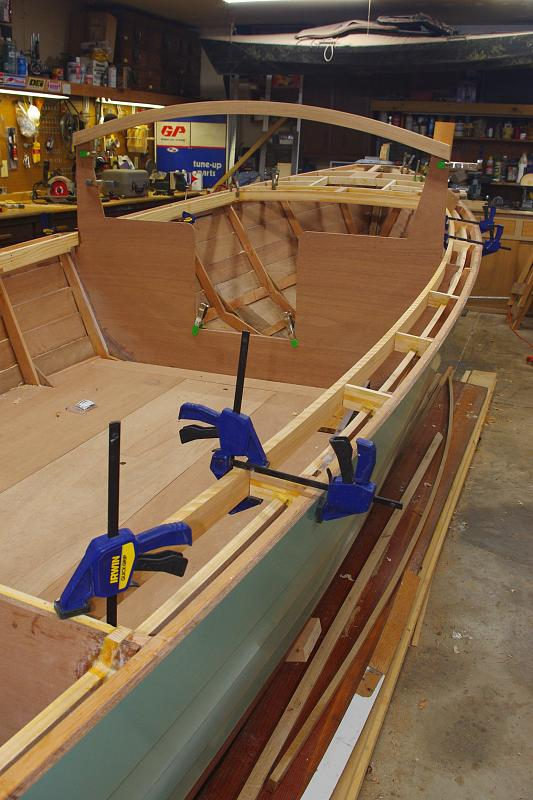
One can see how the motorwell and compartement is before painting and making hatches and motorcover. |
Here is the main deck. It is made of 9mm birch non slip pheno-lcovered plywood. |
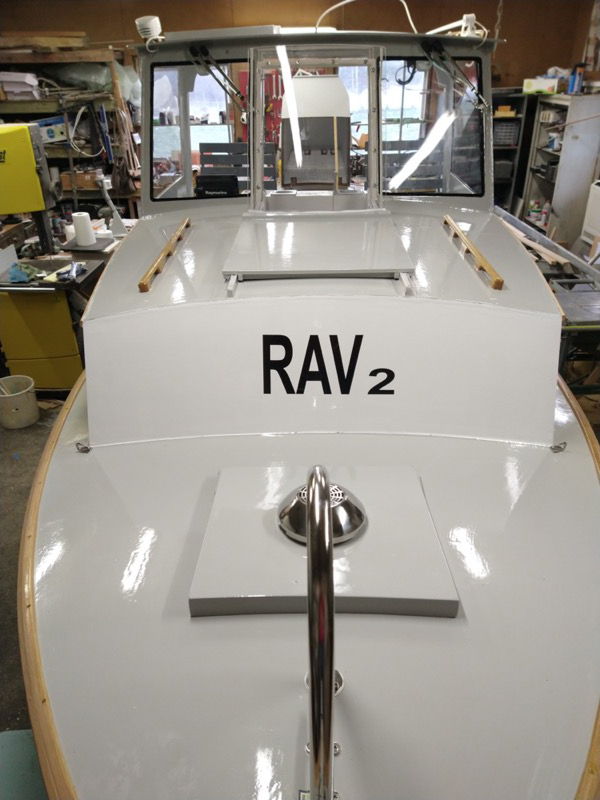
This is the front deck. The longest beam is laminated ash, the other pine. The hatch is bigger than on the drawing, 42x44 cm. to accomodate everyone using the boat. Doublers have been mounted in the centerline, 16mm plywood. There will the two halves of 9mm plywood joined together, - glued to the doublers. |
 |
 |
 |
The coaming is doubled and reinforced, to give good fastening for ropes and what to come inside. |
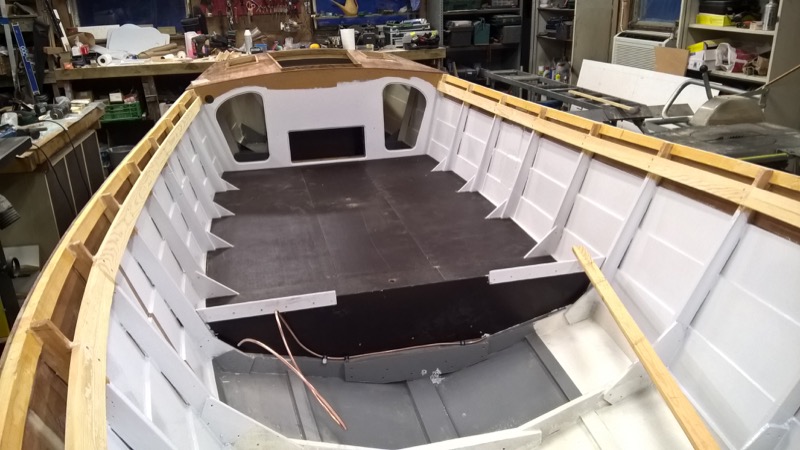
The foredeck is finished, likewise the walking coaming. Roar follows his instincts on dimensions for the inner construction. He stays faithful to the form, shape and deplacement. As he lives in Norway, Roar needs to ensure the construction can withstand the harsher conditions, and the boat needs to be a bit more sheltered. |
The foundation for petrol-tank, and the porta-potty is ok, as is the after deck with opening for battery and luggage. Roar has use of some birch-fenol covered plates inside. He has only 12 sheets of 9mm okuome and 3 sheets 12 mm. It is a lot of work to do, but it is fun. Roar hopes this will be the last winter inside house. |
 |
 |
 |
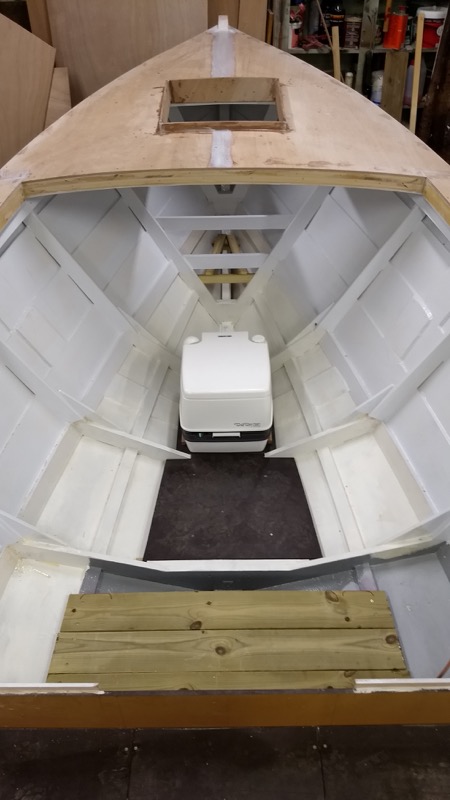
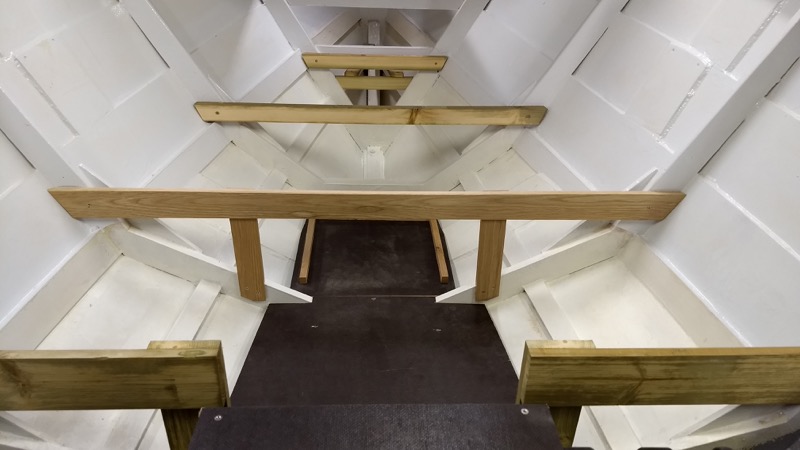
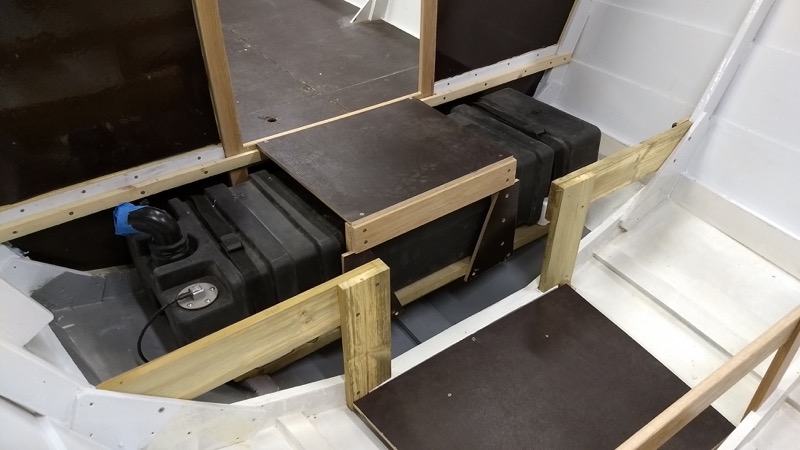
Here are some new pictures (Nov 2017) from how I have done the sitting and sleeping in the cabin, and mounting of the fuel tank. |
The fuel tank is a Nuova Rade , 73l, 110x35x22 cm. |
Roar is now working with cabin and cabinetry. |
 |
 |
|
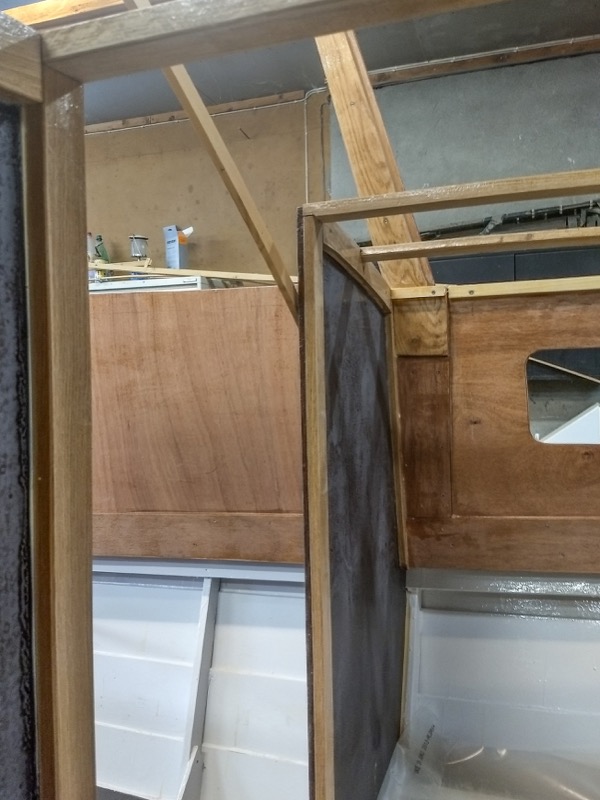
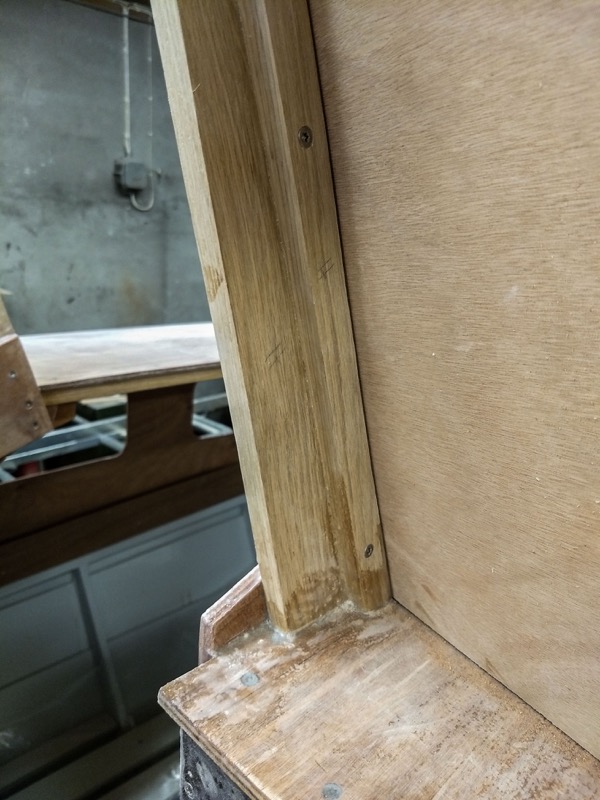
Here is the inner coaming finished. It protrudes about 3.5cm above side deck to support housing and outer coaming to come. On the starboard side, the inner coaming is 4 cm deeper, - making a tunel for wiring, and steering. The most time consuming part is not making of each piece, but the coating of exposed surfaces. Before fastening, each piece is receiving sanding, and cleaning, then tree ore more layers of West epoxy with cleaning and sanding in beetween. Two or tree days work from forming to fastening, at least. The reason is: I want all parts to be totally water tight/encapsulated. In the end they shall receive two layers of two part polyurethan. |
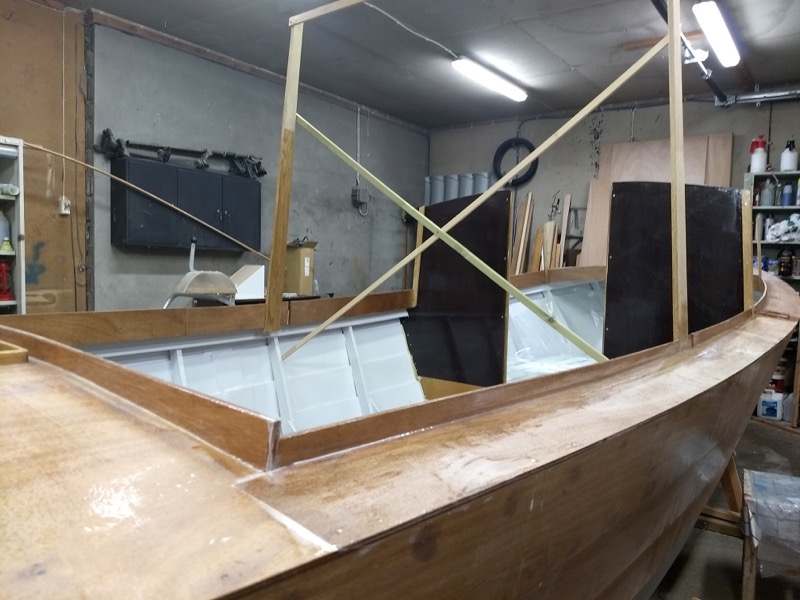
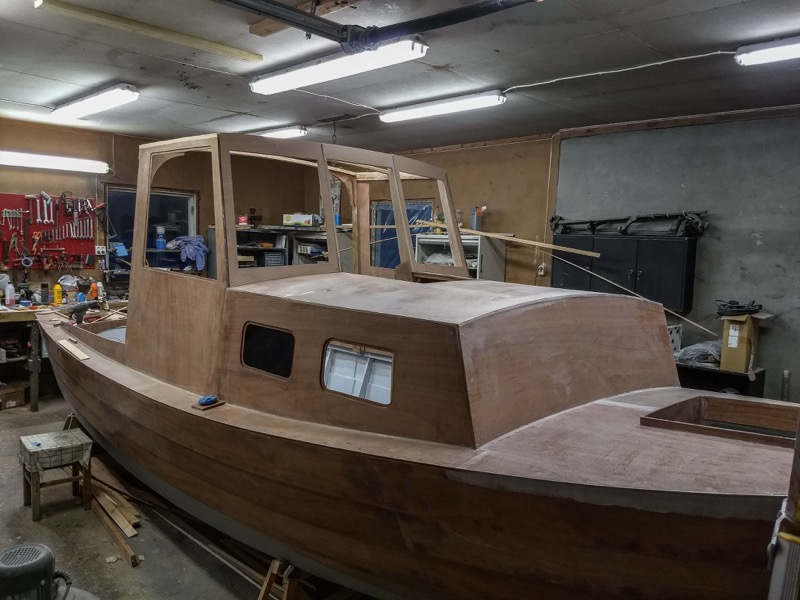
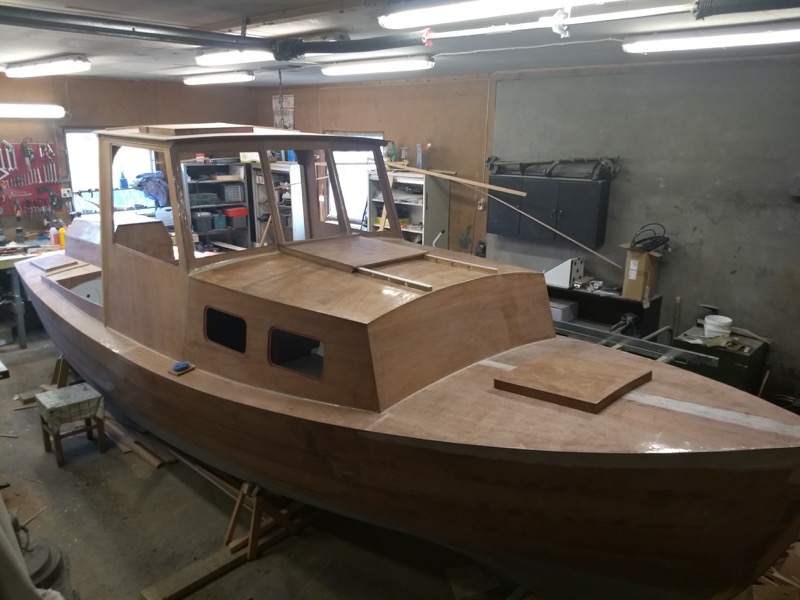
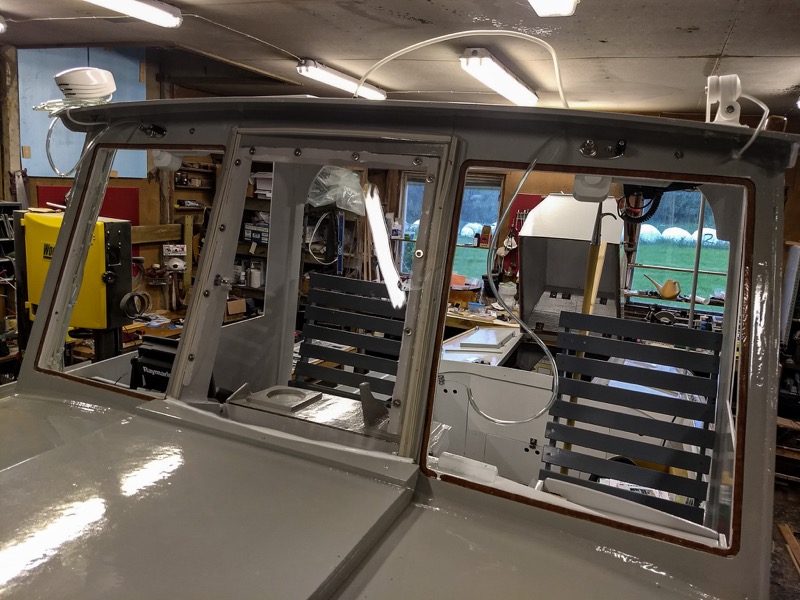
The first rough mounting of house and "stall" (the partly open and partly sheltered steering station). Now you can see how I am building for cold and windy places. The average summer temperature here is about 13 degrees celsius, lot of rain. The "stall" side walls is made up of exactly one sheet plywood 1.22x2.50m divided in two. The cut outs for polycarbonate windows is not done yet. The cut outs for the maine side windows will do the frames for two of the tree front windows. I have to decide the size, to get all in a sort of harmony. I am allways using the main drawings, not changing the main dimensions. |
|
 |
 |
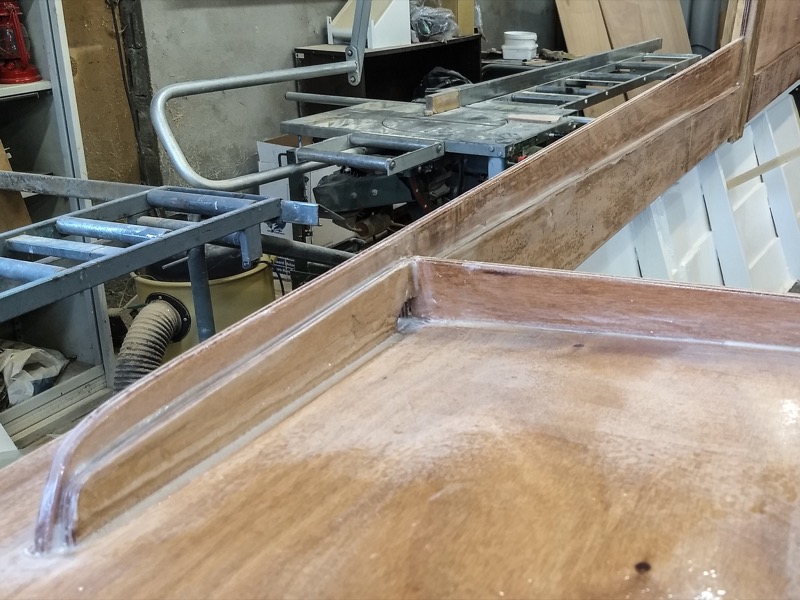 |
The boat with the mounted side panels and coaming, the cabin. Each part has received three layers of West epoxy on each side, sanding after the first and after the last. All done before mounting. It is a time-consuming task that requires a lot of cleaning. |
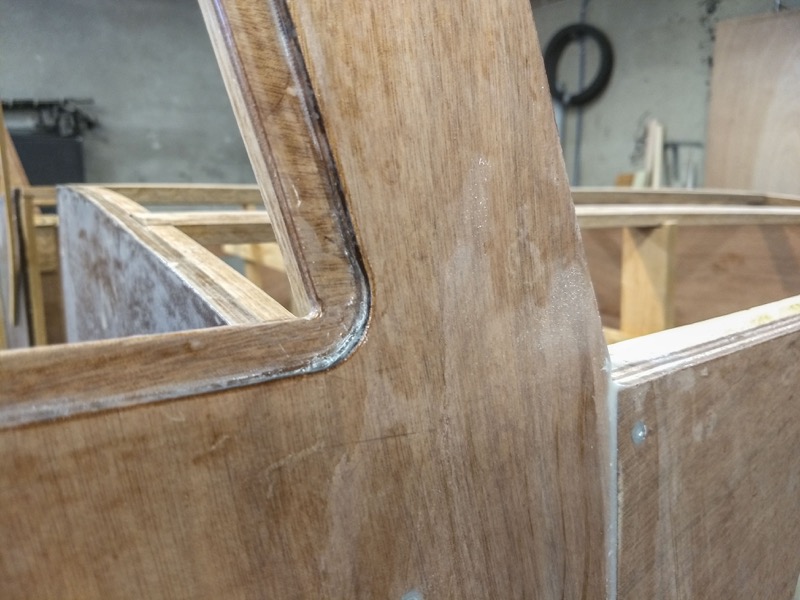
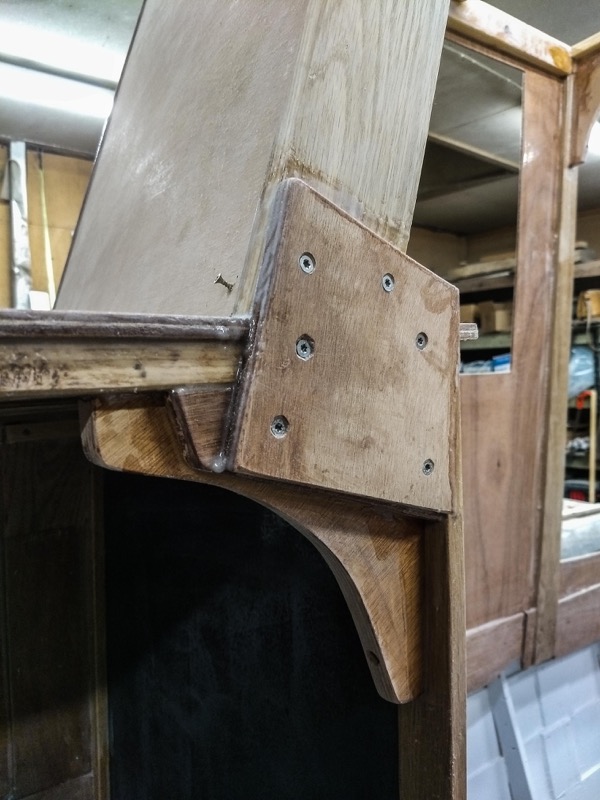
Detail of the connection between the front panel and the back panel of cabin. Doublers made of plywood and some oak, the oak also as strengthen the area in front of the big side window. (where the front window will be) |
Detail of coaming with doublers aft to receive canvas for the tarpaulin. One can also see a drainage hole. |
 |
 |
 |
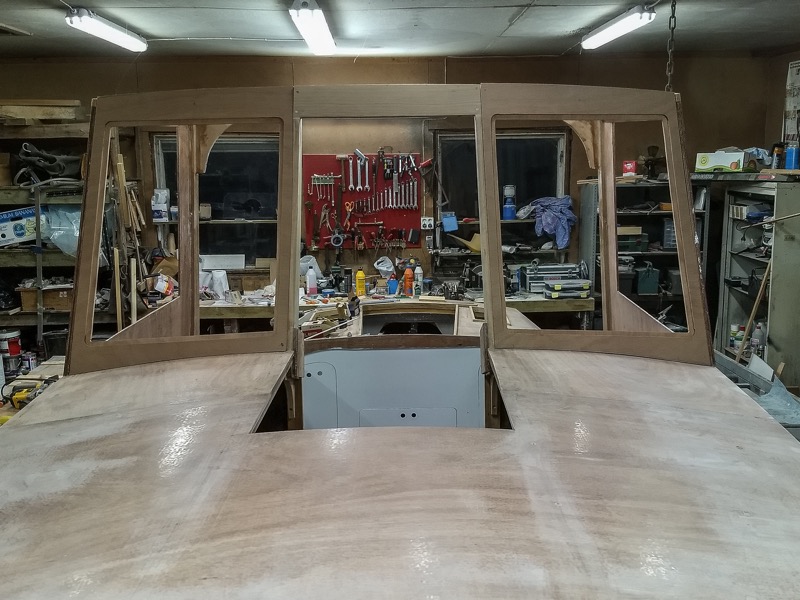
Detail of window coaming. With a router I have made a 12mm wide socket where the polycarbonate window will be placed. |
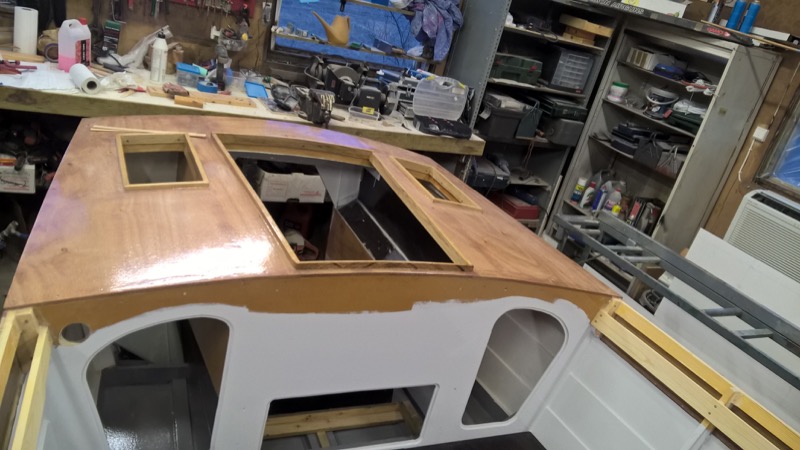
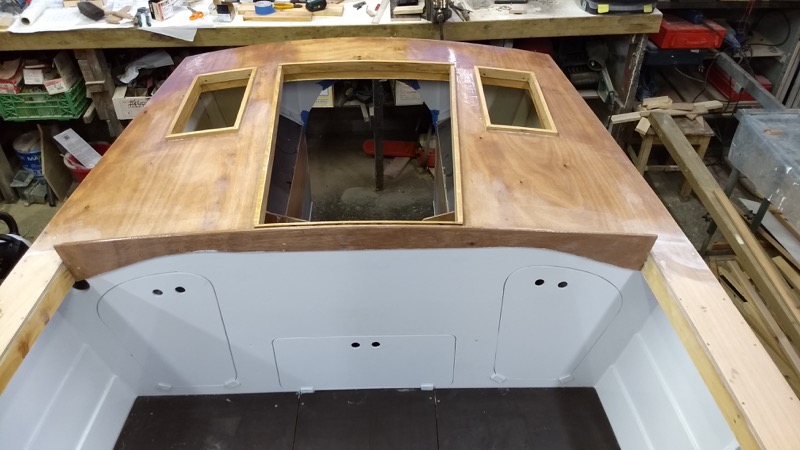
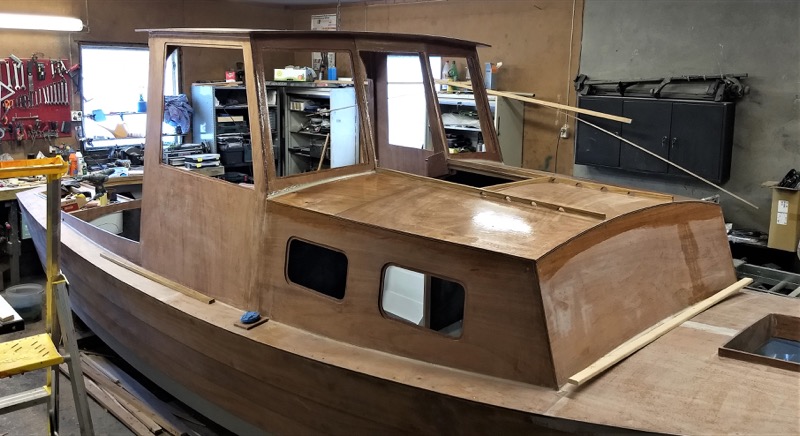
The front roof is test mounted before surface treatment. |
Some detail of the framing |
 |
 |
 |
Details of how the middle framing is fastened and fixed to the cabin top. It shows how the stress/force is distibuted. |
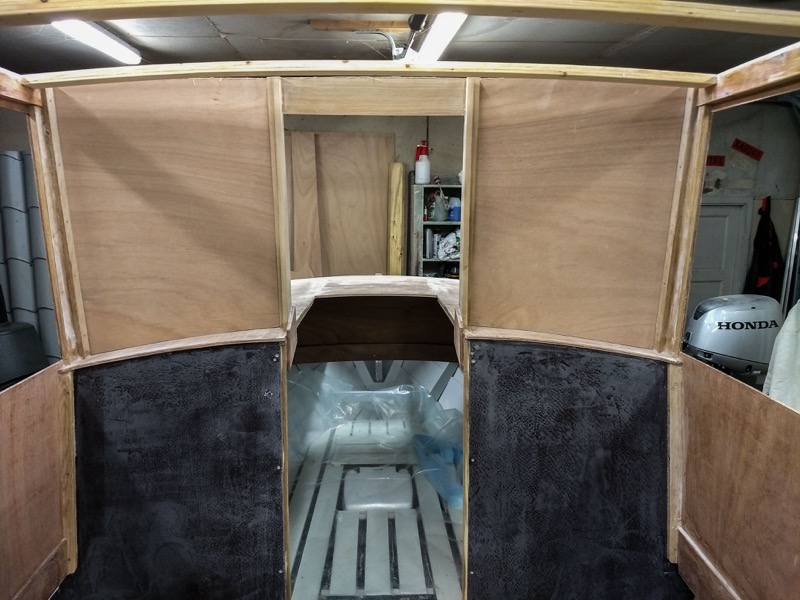
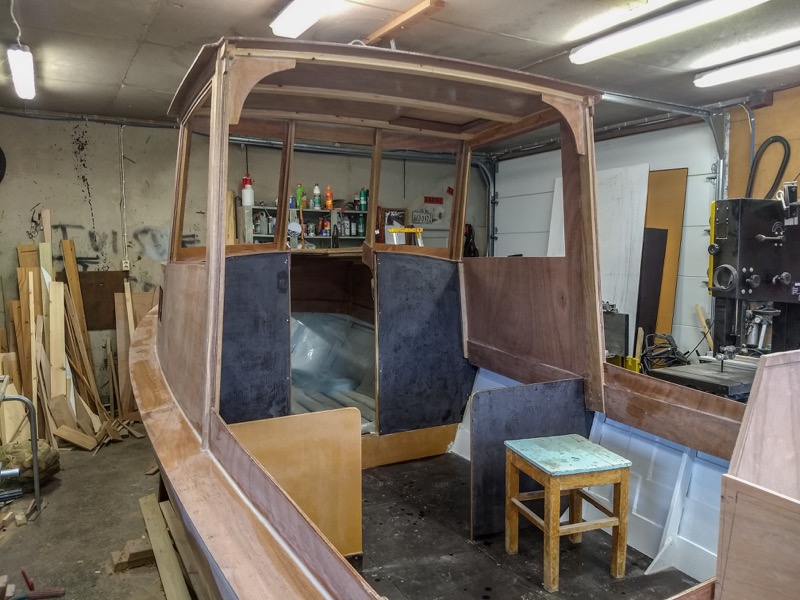
An "inside" view to the aft of the boat. |
The opening for the hatch and front plastic window is finished. The framing and the plywood where I will cut out for the windows is perfect in place |
 |
 |
 |
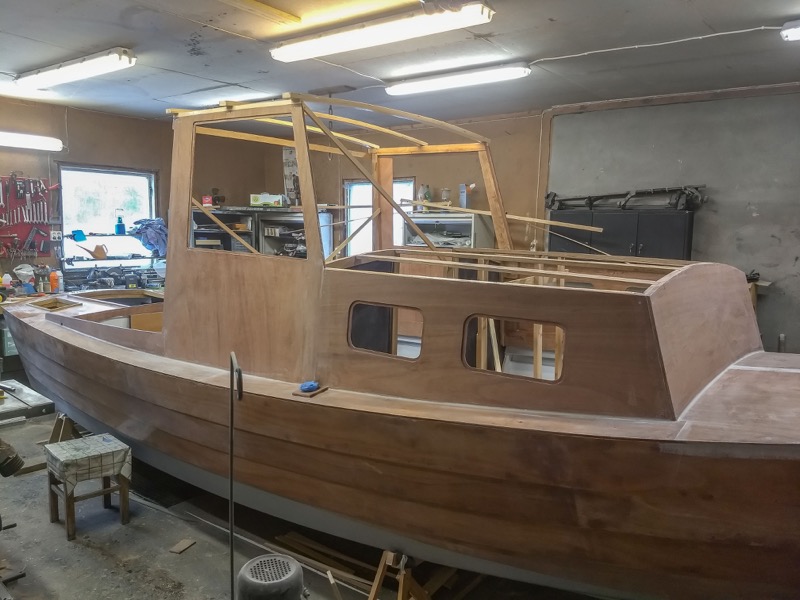
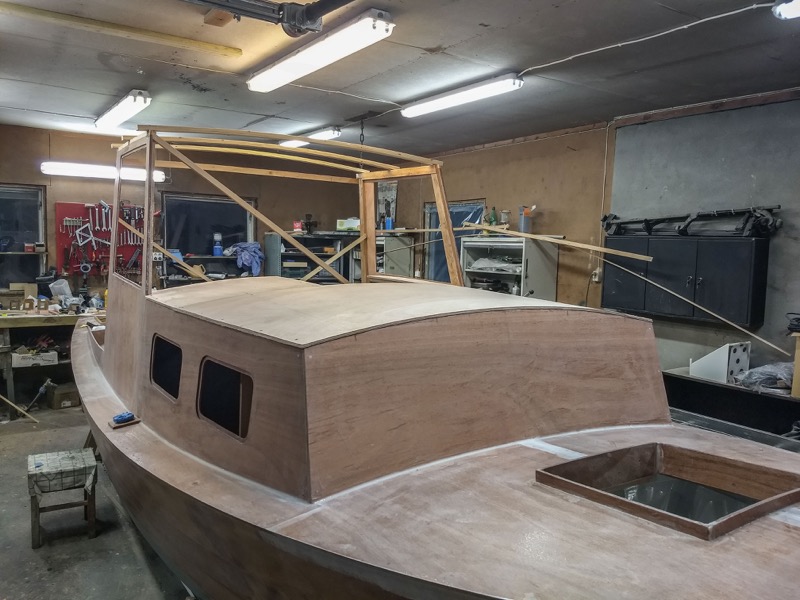
A different angle |
The roof is in place! Now, I have to work on the interior and finishing ++. |
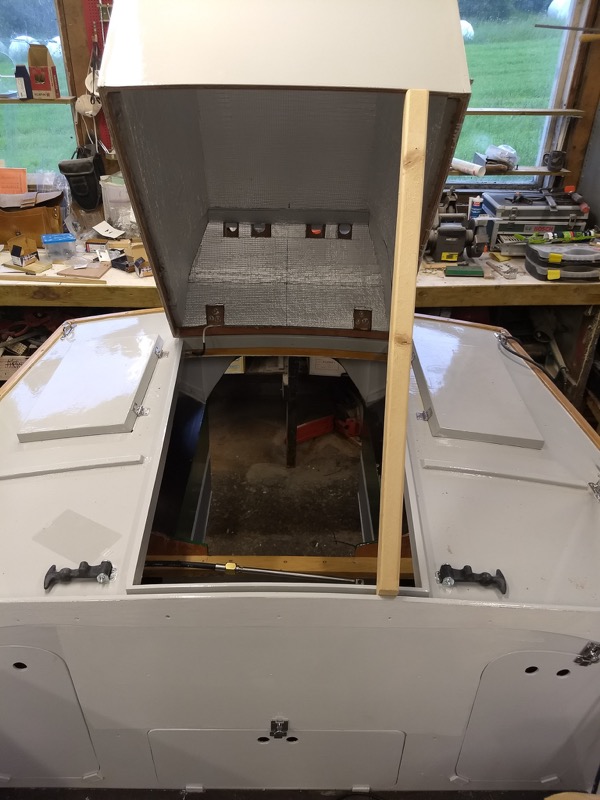
May 2018 - Building the hatches. One of which is the motor-cover. It will be possible to raise the motor without raising the hatch. |
 |
 |
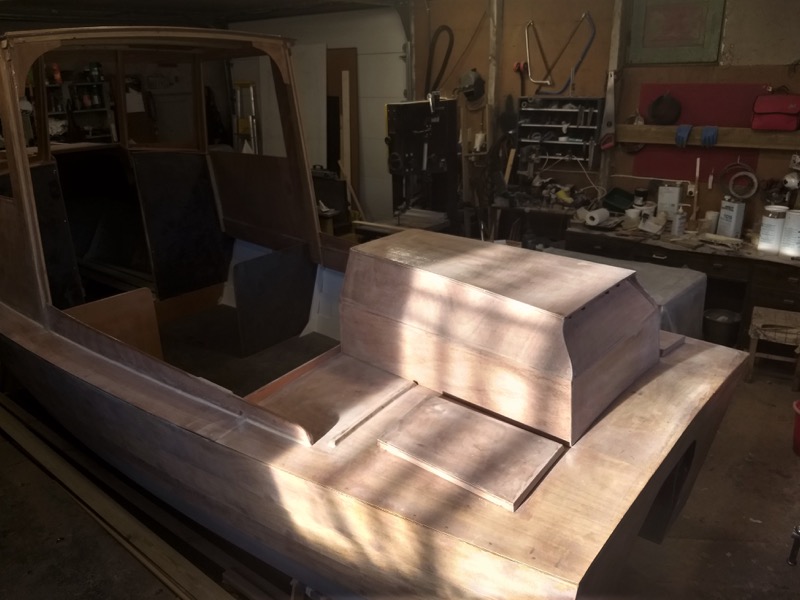 |
May 2018 - Inside of the "stall" - sheltered steering place. It is 6 feet 4 inches, or about 1.96m. To enter the cabin, one will need not need to bow, - the middle front window will follow the hatch forward. The two other front windows are produced with 4mm hardened glass. The rest is polycarbonate. |
November 2018 - Roar is back and aiming to finish building his boat. All the hatches are made. |
On/to the sliding hatch on the roof, the middle window will be fastened. All the windows are produced, two in hardened glass and the rest in polycarbonate. The hatch over the motor is so high, I do not need to move anything when lifting the motor. On the top, the fish will be prepared. |
 |
 |
 |
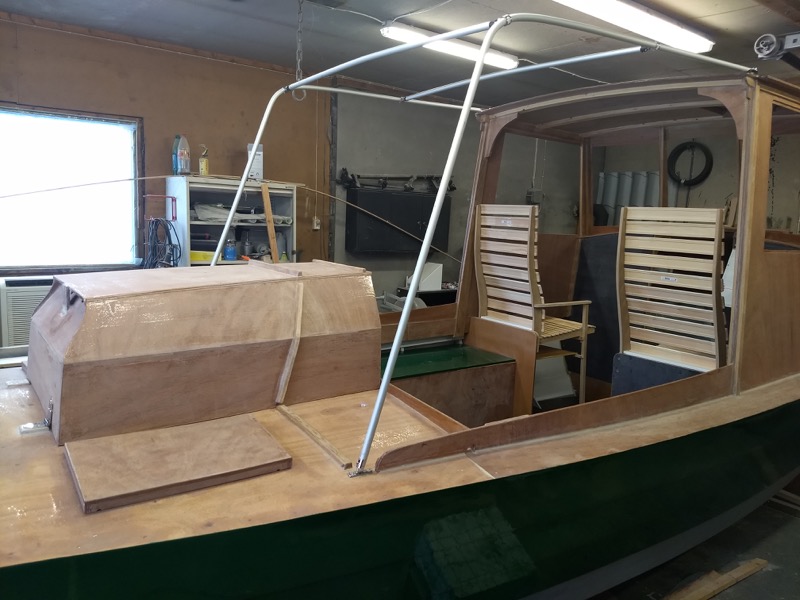
Next is chairs, stearing wheel and stearing aid , painting and fastening of all hardware, mounting of motor and elctrical work, making an awning and madrasses. |
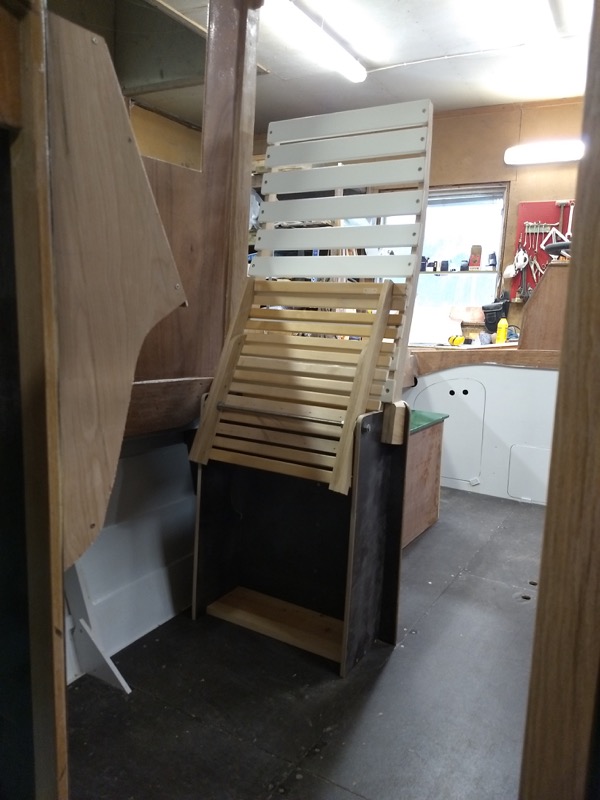
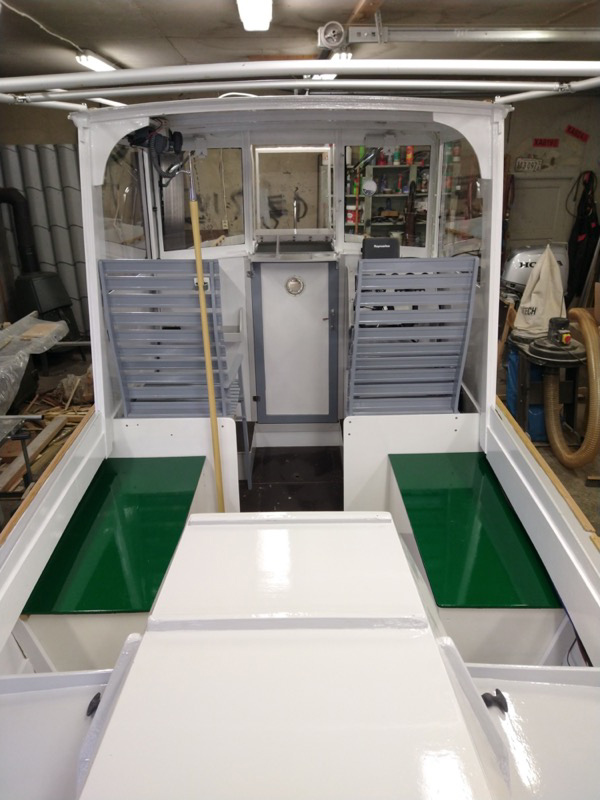
Here are the two chairs. Under the passanger chair, there is a place for marine maps and movable refrigator. You can also see the start of the tarpaulin/canvas roofing. |
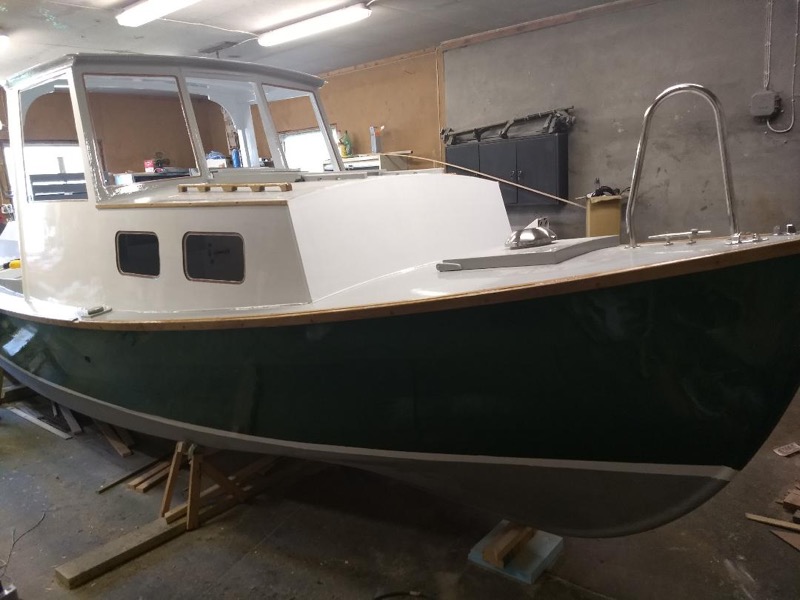
The captains chair can be tilted up. You can also see the green colour for the hull. Next step is steering station. |
 |
 |
 |
June 2019 - Roar is finding time during the busy spring summer to work on his boat. |
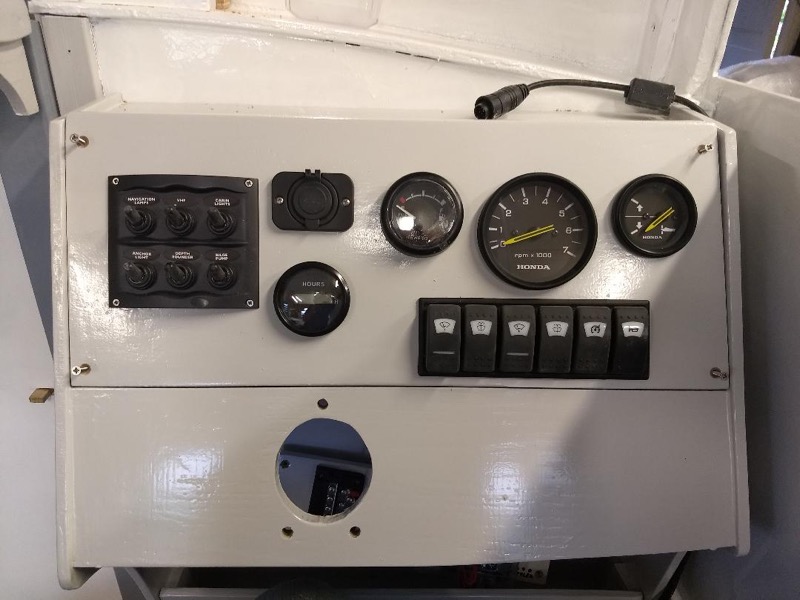
The electical/instrumentation is almost done, after which he will focus on on the windows and motor. |
July 2019 - More finishing touches are added. |
 |
 |
 |
The motor still needs to be dropped in |
The windshield still needs to be installed |
|
 |
 |
 |
On the bright side, all the electronics are installed. |
February 2020: The project is close to being completed. |
Only some "madrasses" (cushions? -ed), antifouling and motor and motor-electric left to complete. |
 |
 |
 |
The end is in sight. (note from Pat, this build has been heavily modified from the original plans, and cautions such changes should be very carefully considered. Roar seems to be very skilled at what he does, and we are excited to see a successful and safe launch of his craft!) |
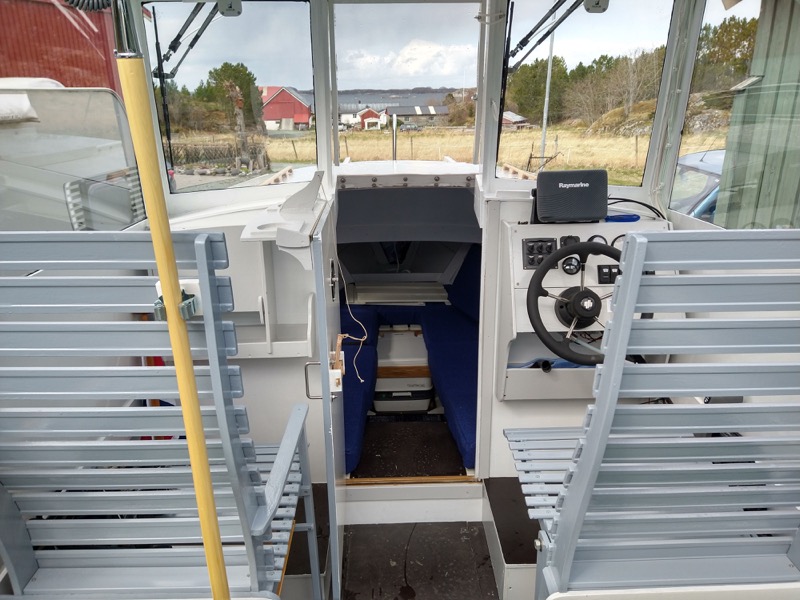
The captain's seat can lift up for more clearance |
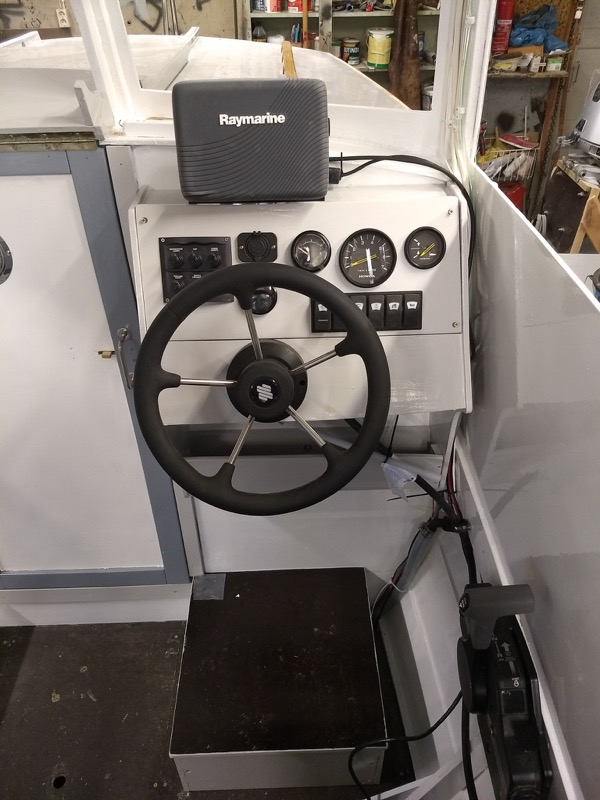
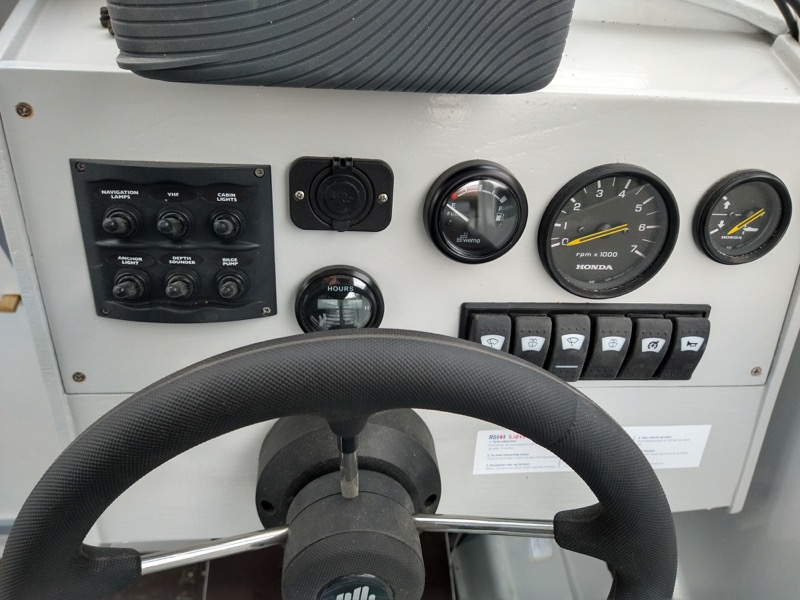
The instrument cluster has: The customary fuel/engine gauges. Windscreen wiper controls with washer, on hardened glass. The center window is 6mm polycarbonate fastened on sliding hatch to make it easy entry. Raymarine 78a multi instrument - echo and chart, Cobra VH. |
 |
 |
 |
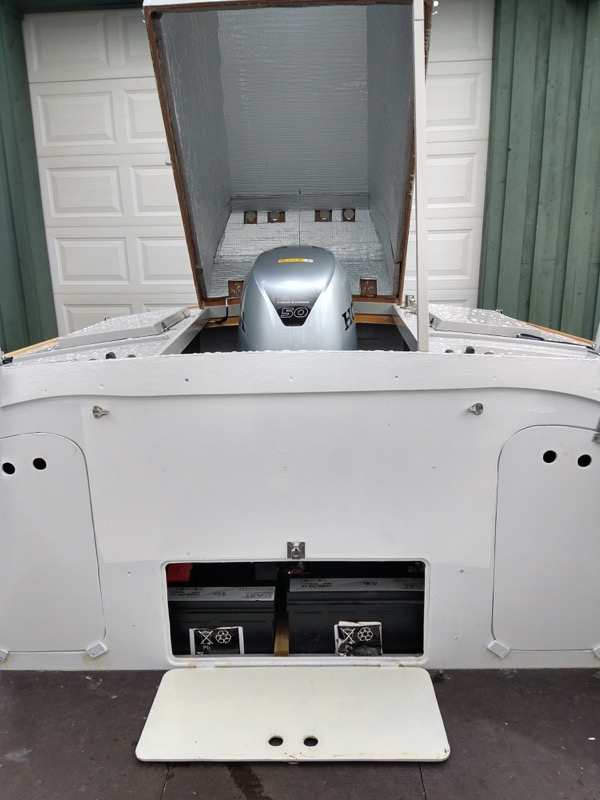
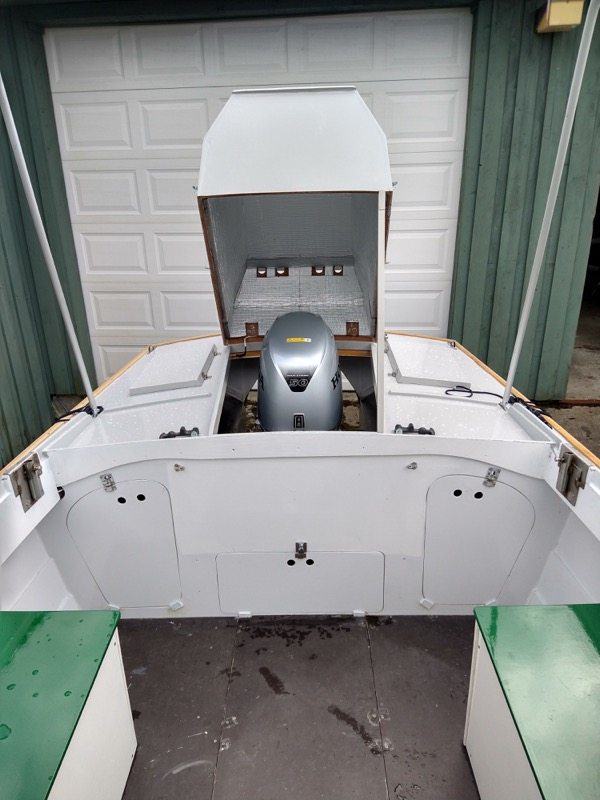
The motor in the well has full movement with a mere 1 cm clearance on all sides, even when fully lifted. Roar made the calculations nearly 5 years ago, and it fits! One needs to know what motor to use before constructing the well. |
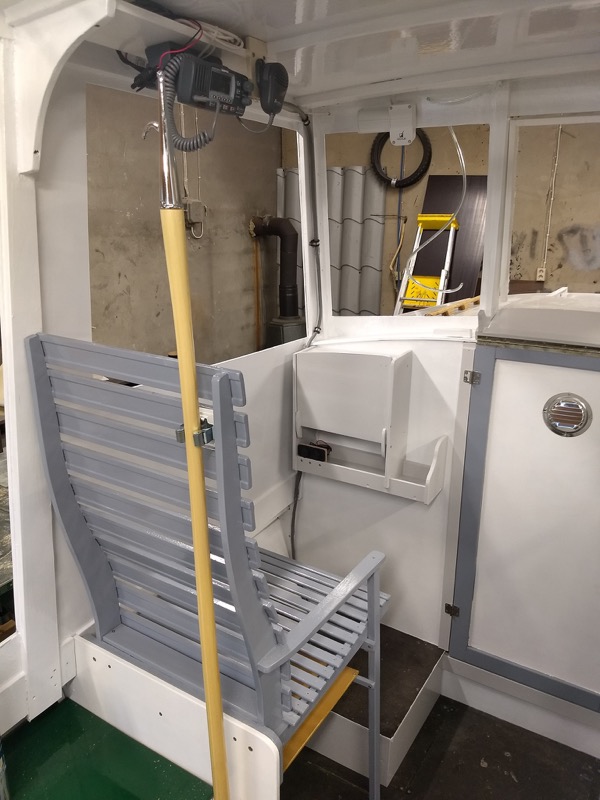
Under the motor compartment you will find the batteries. For managing power, Roar uses BEP switches and a four way relay cluster. There are dry compartments on either side of the motor along with lockers for personal use under the green benches. The railings have fasteners for fishing wheels. |
In the forward compartment you will find a portable porta-potty, a big seat and double bed with a 12cm mattress. The bow houses both an anchor and wind anchor. The port-side seat hides a chart shelf beneath it. |
 |
 |
 |
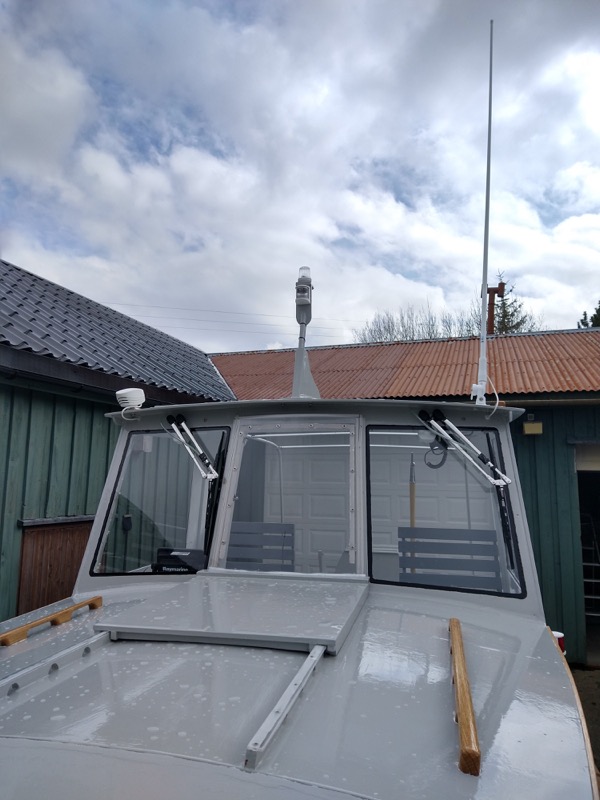
On top you will find a pole containing the navigation and anchor lights and 1.8m VHF antenna. There are possible plans to add a small solar cell as well. |
Materials used: 9mm Lloyds approved okuome plywood: 12 sheets 2,48x1,20, 3 sheets 12 mm ditto, two sheets 12 mm birch construction plywood, and one 9 mm with nonslip. Pine,- sortet and dimensioned by me, about 53kg epoxy and filler, lot of A4 stainless fittings/screws, two part paint, polycarbonate 4mm and 6 mm 1,5m2, a motor. | A few launch photos! |
 |
 |
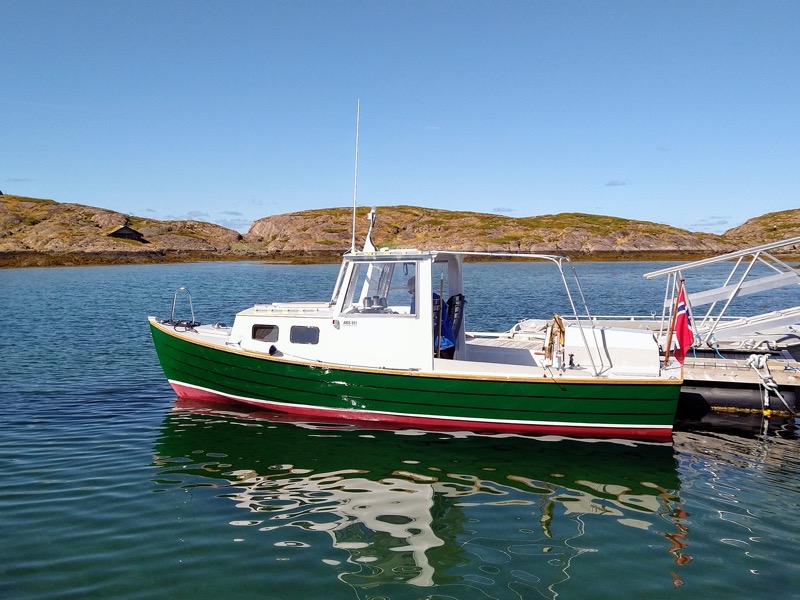 |
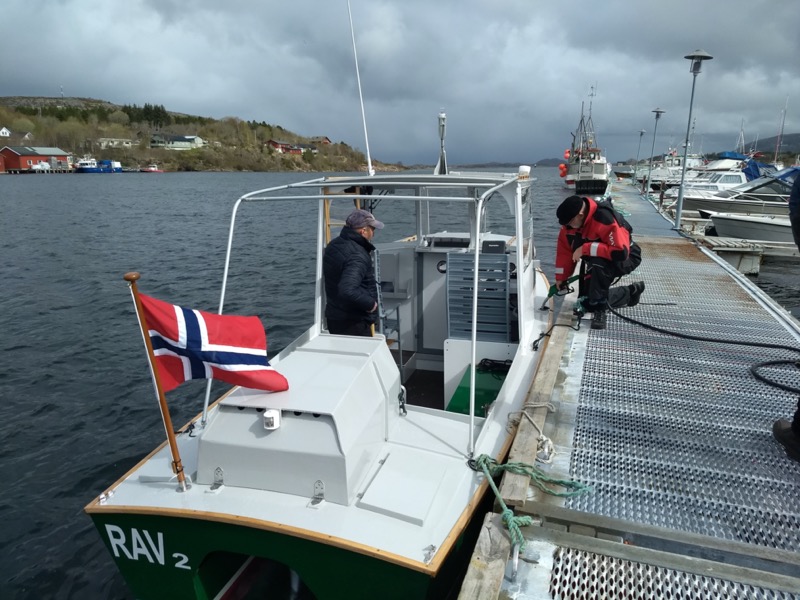
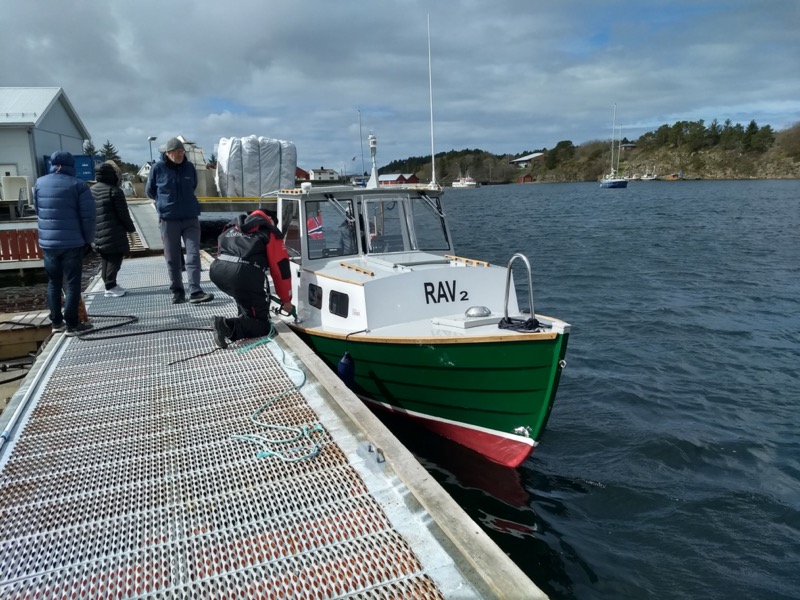
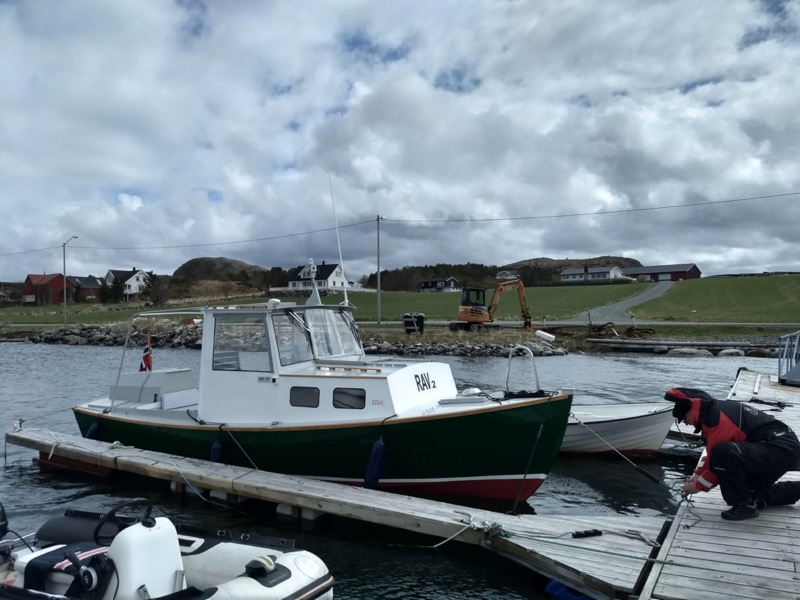
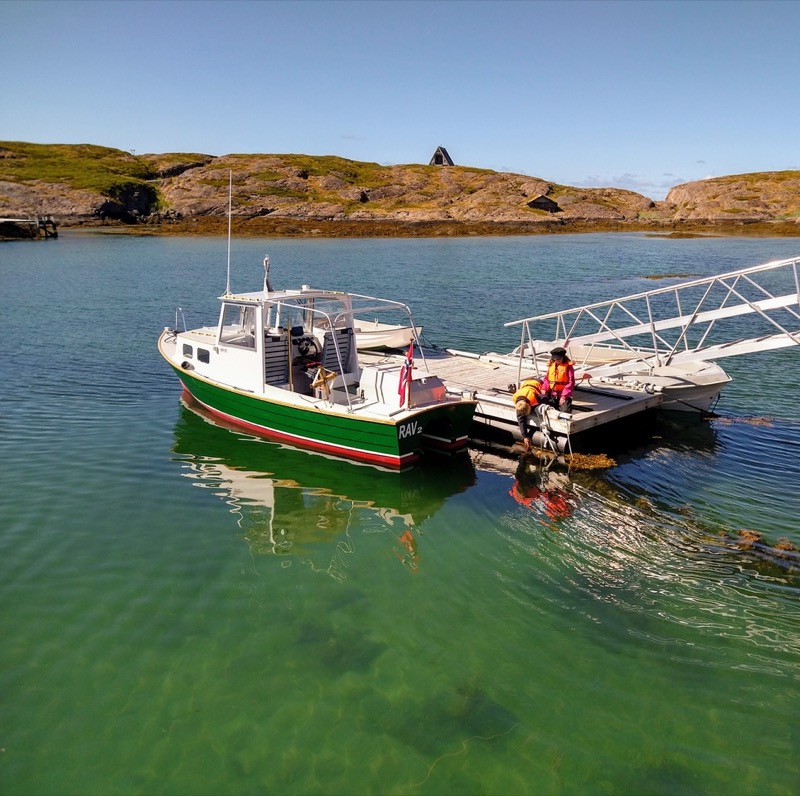
Roar now has a few trips under his belt, and is happy to report that the boat works beautifully. He ended up using a Solas Amita 11.8x10 propeller (10" pitch). "The boat is most happy with lower speed, 12-14 knots is fine transporting, 8-12 very relaxing." |
||
 |
 |
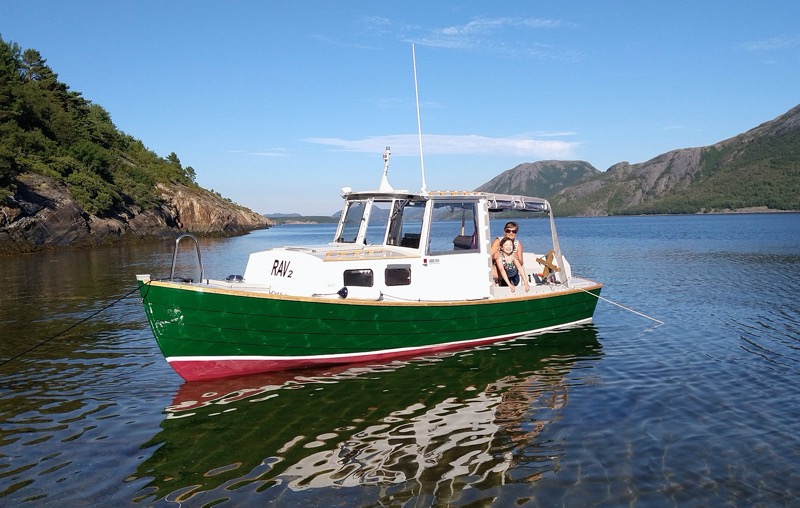 |
The awning is now on the boat and working well! |
||
 |
 |
|
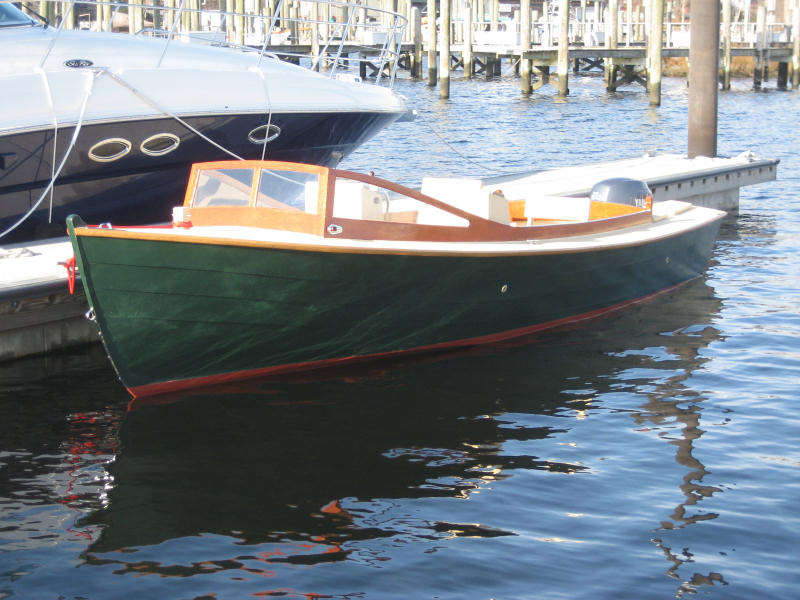
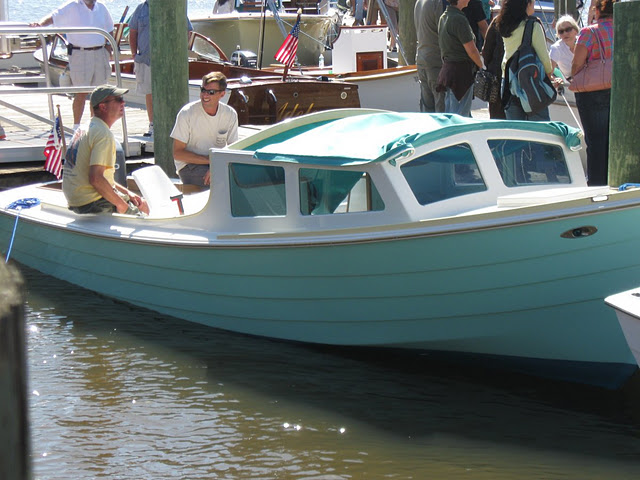
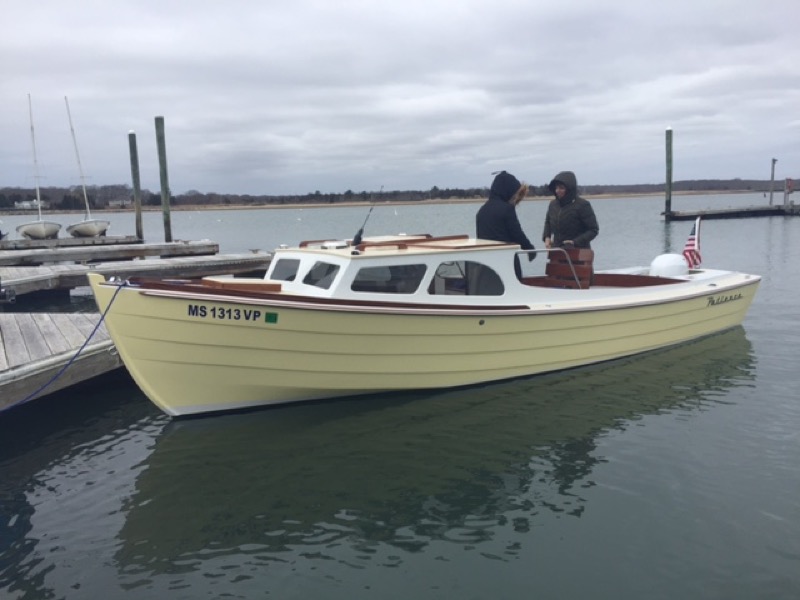
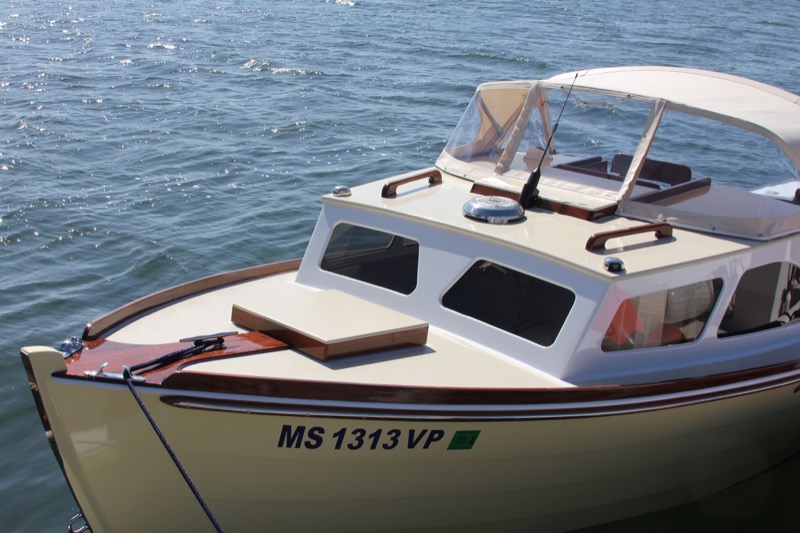
This is Victor Pinheiro's Ninigret, M/V Patience, completed in the spring of 2017 from New Bedford, MA |
Another great view of Victor's boat. |
|
 |
 |
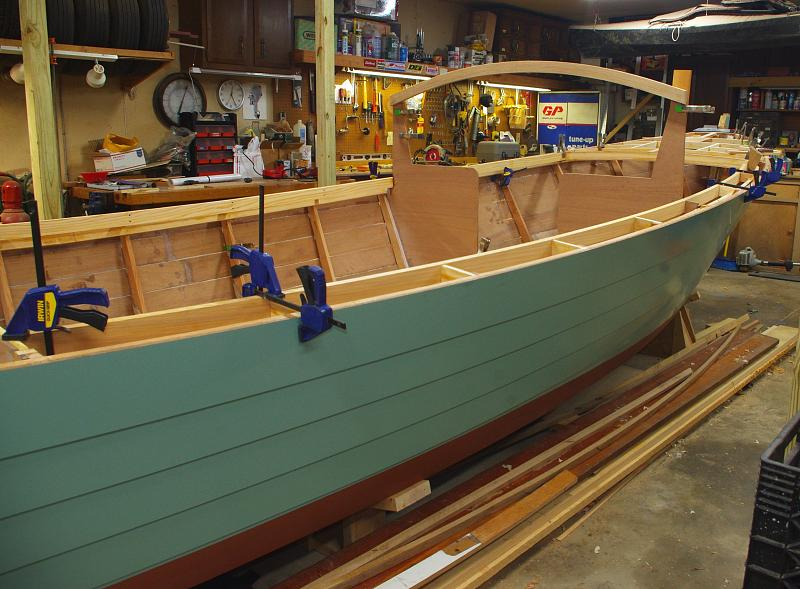 |
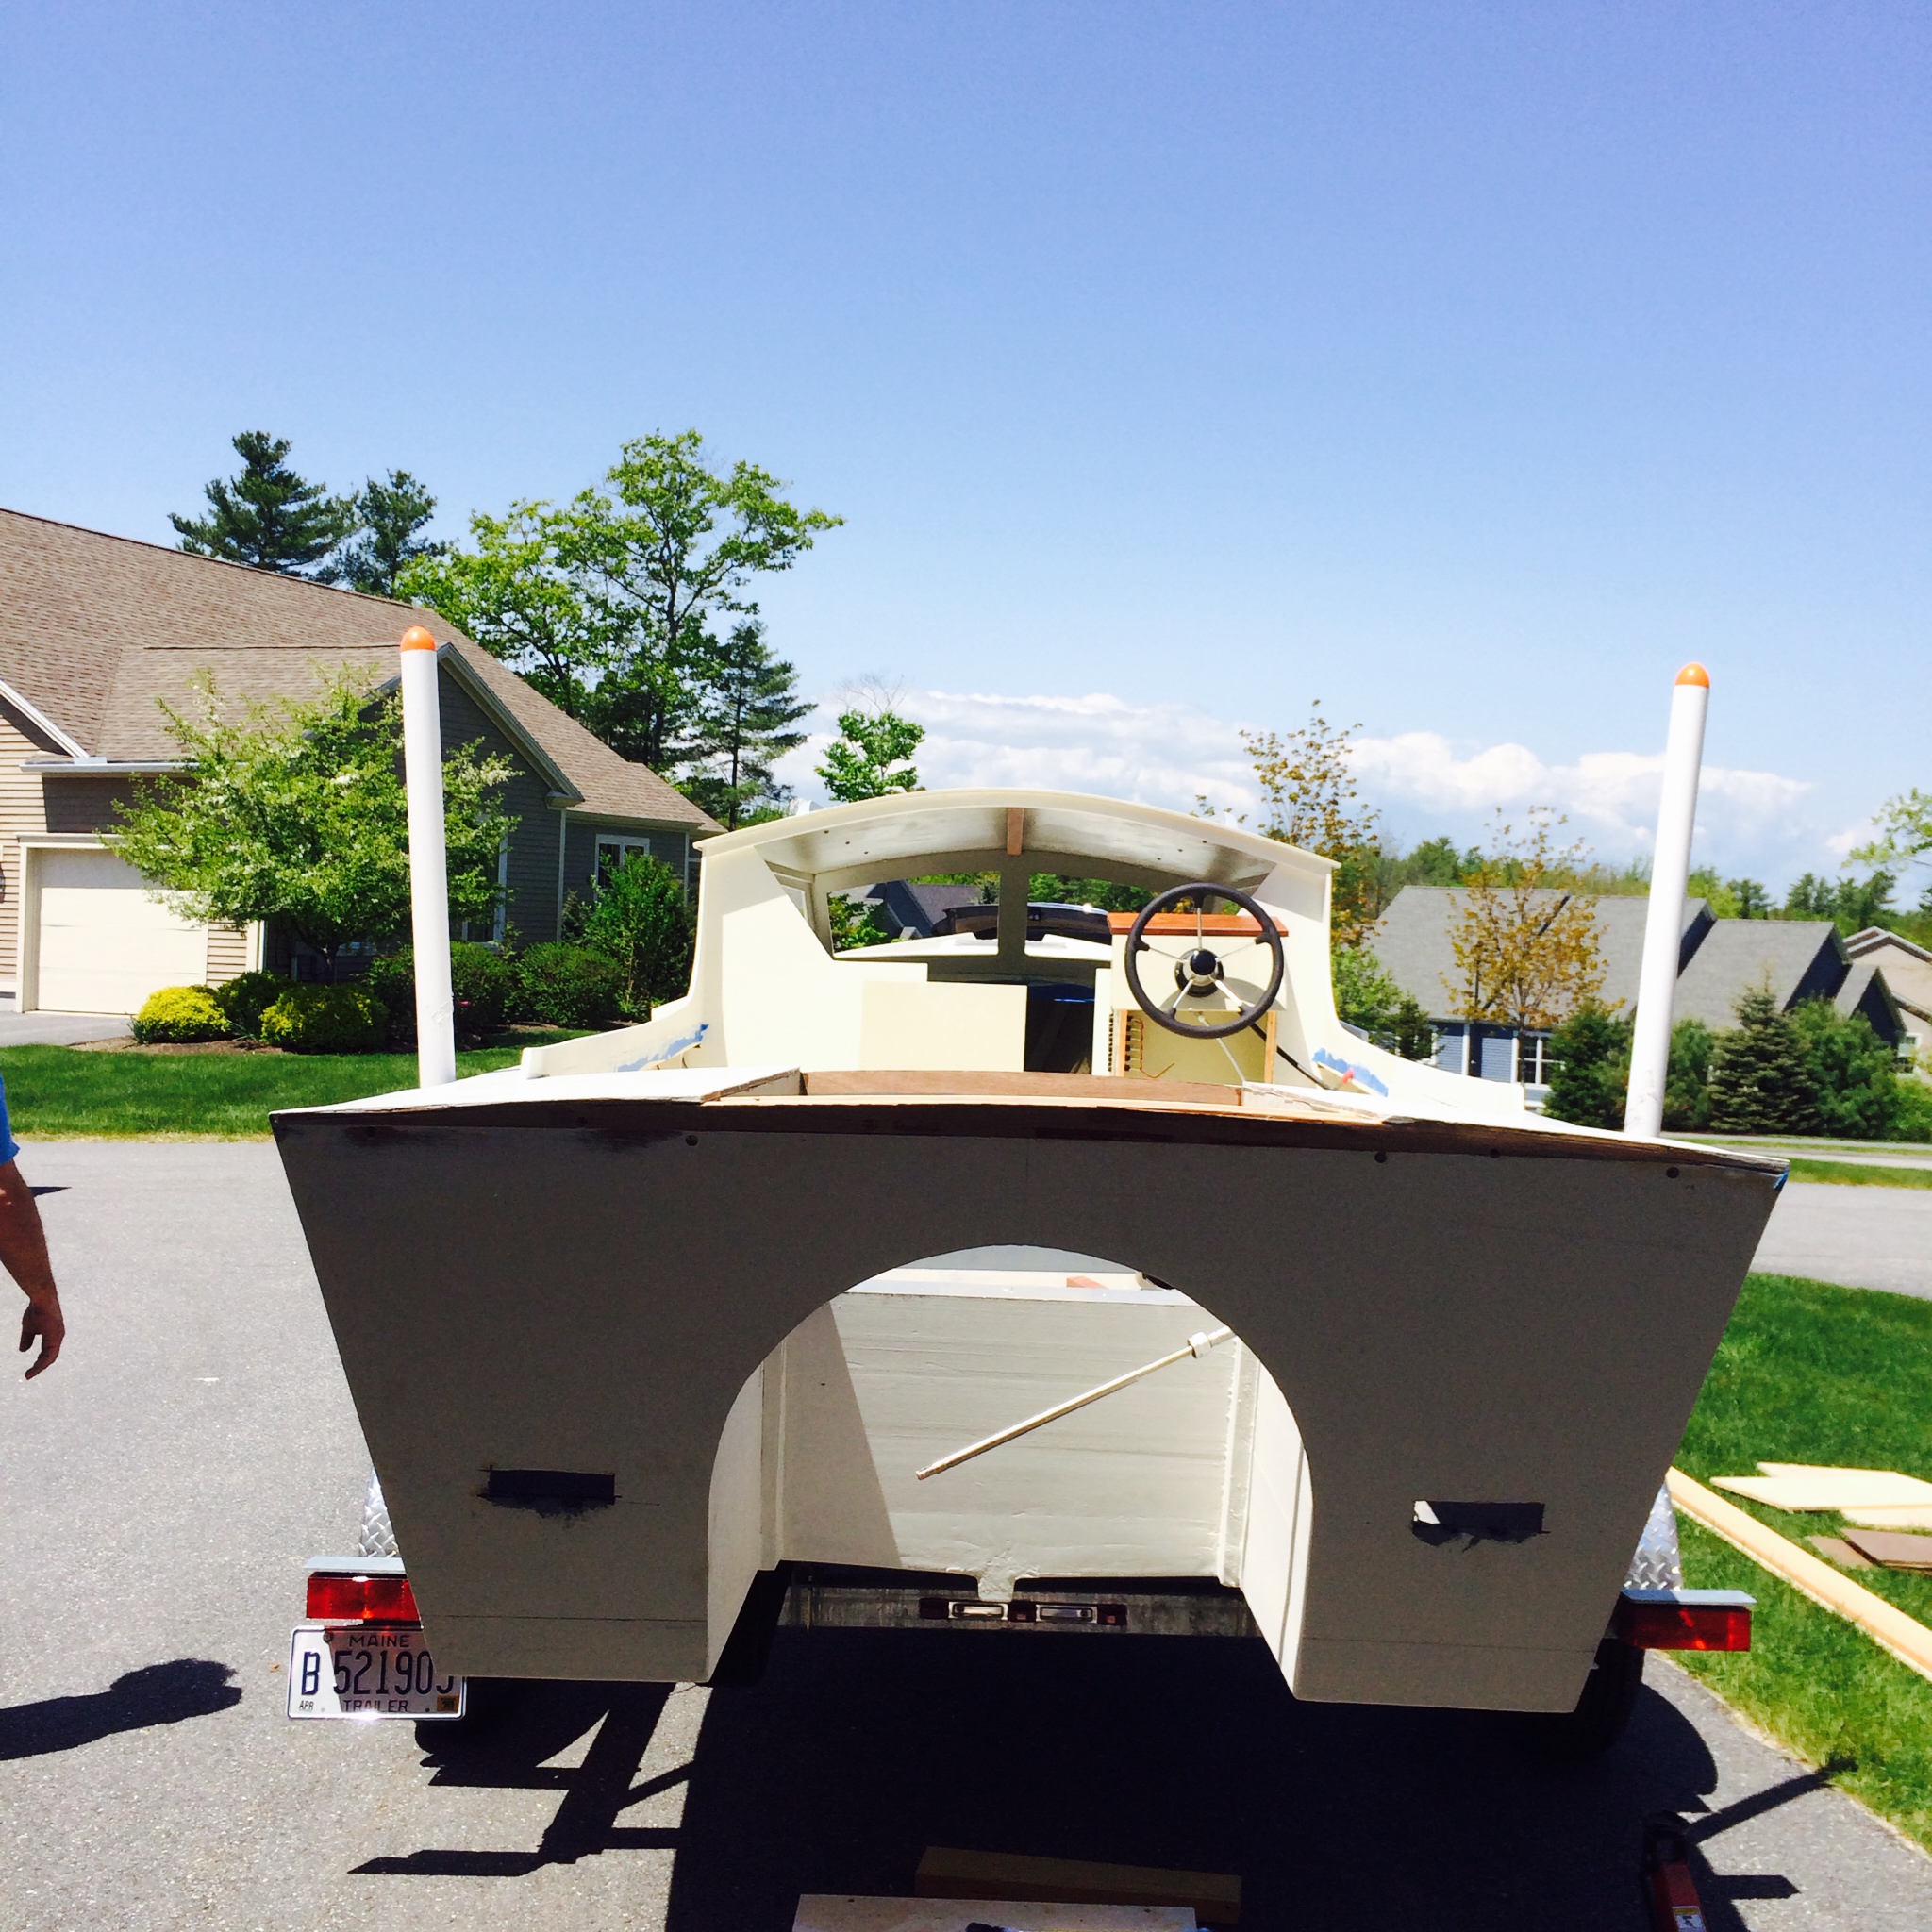
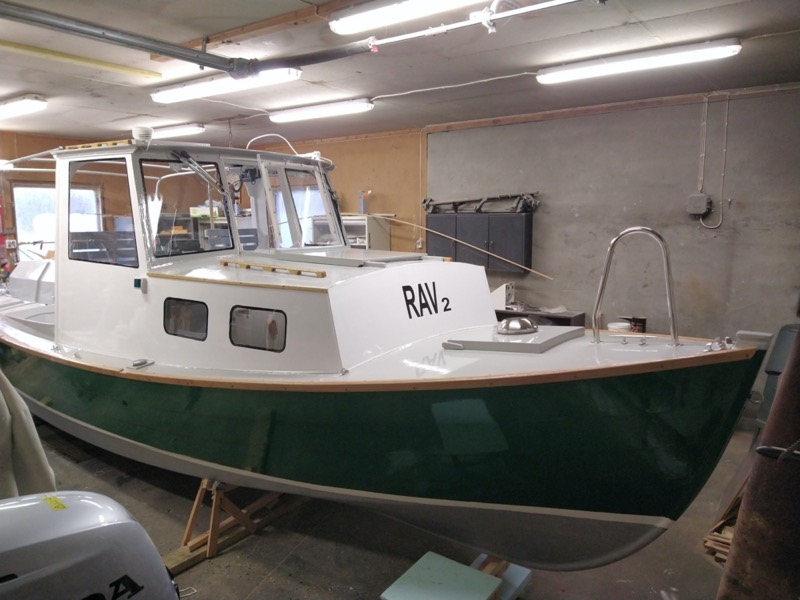
April 2021 - Tim Abbott has spent the last 2.5 years building this Ninigret |
He hopes to have it finished by June 2021. |
|
 |
 |
 |
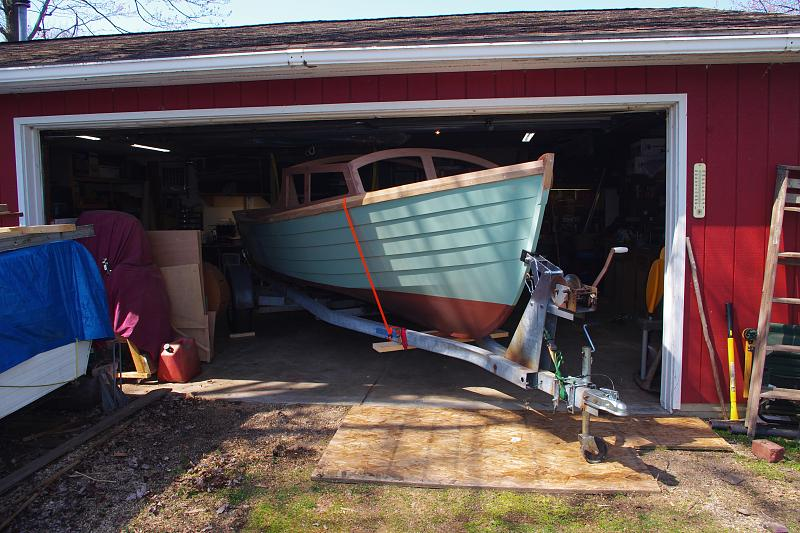
Here she is being lowered onto her trailer. |
Exiting the garage for the first time. |
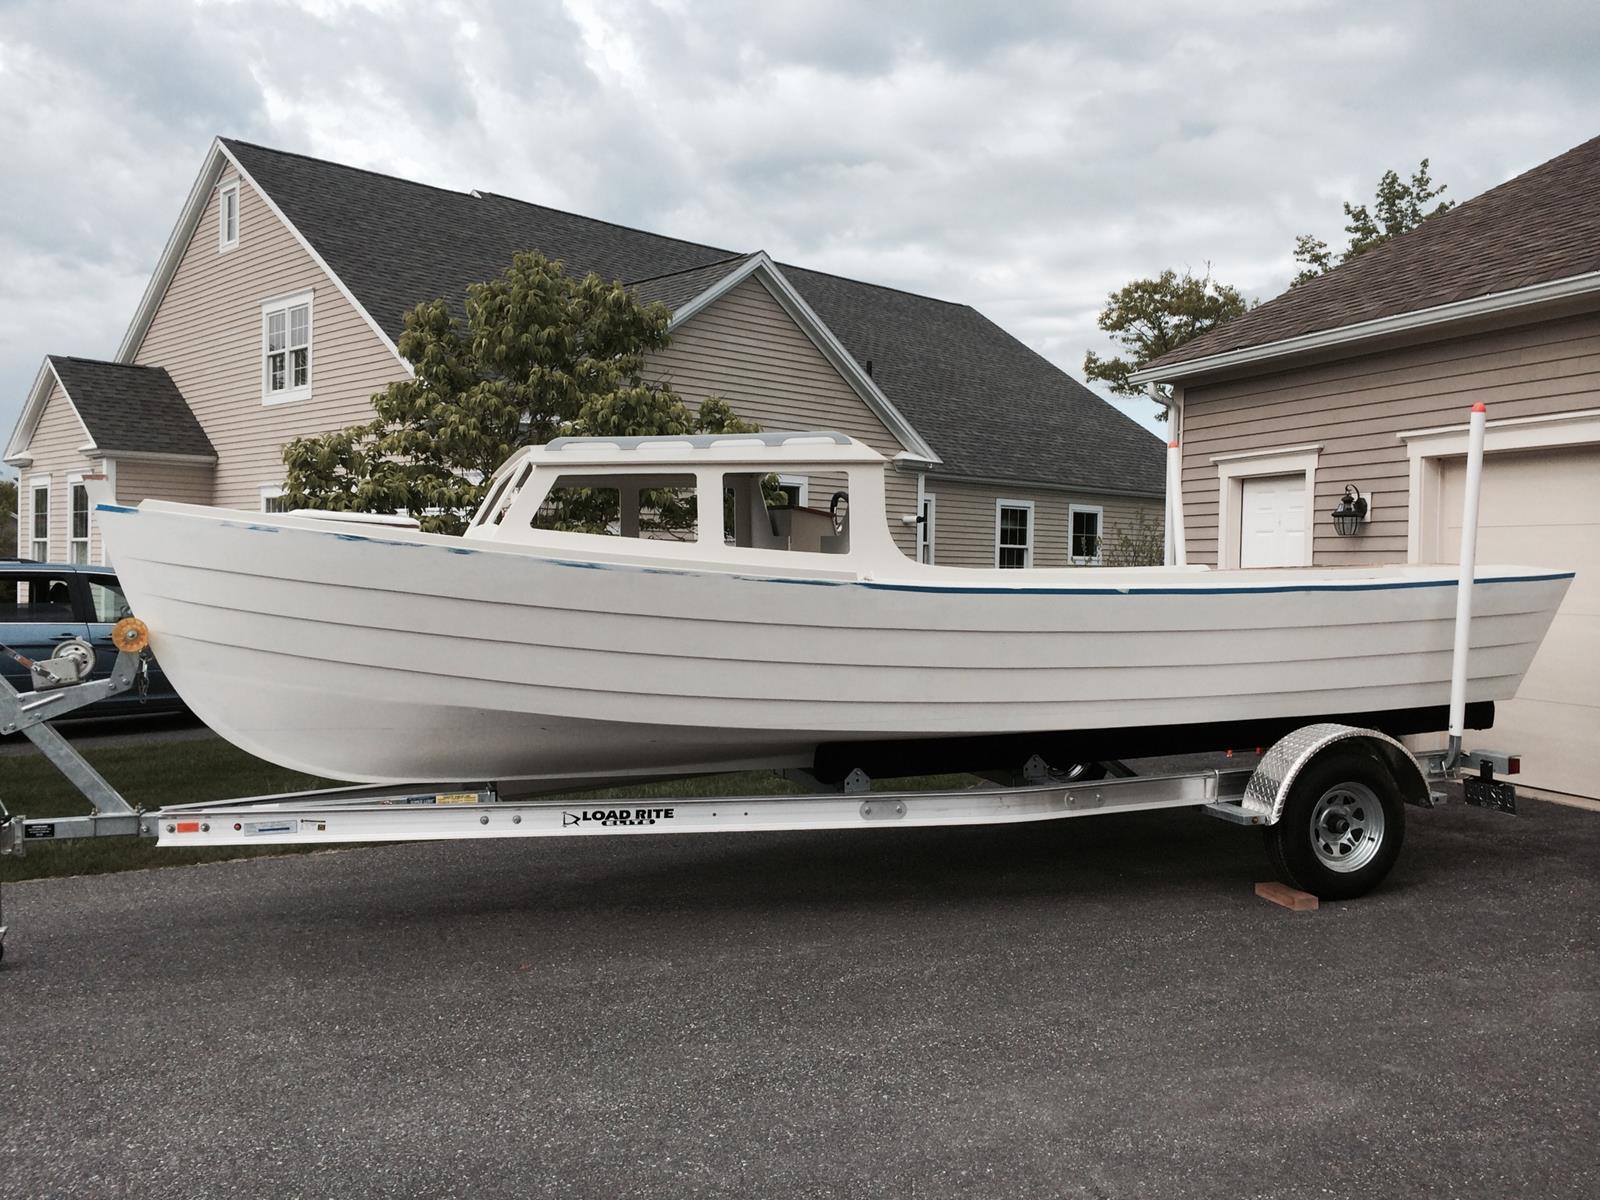
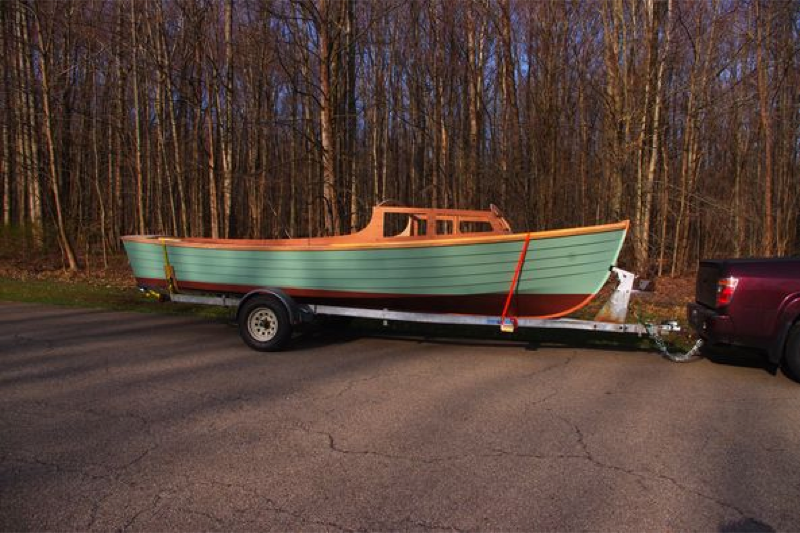
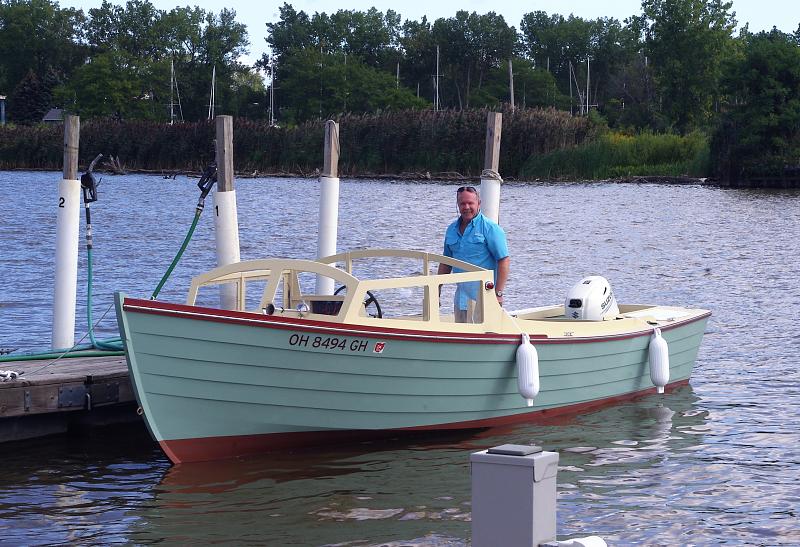
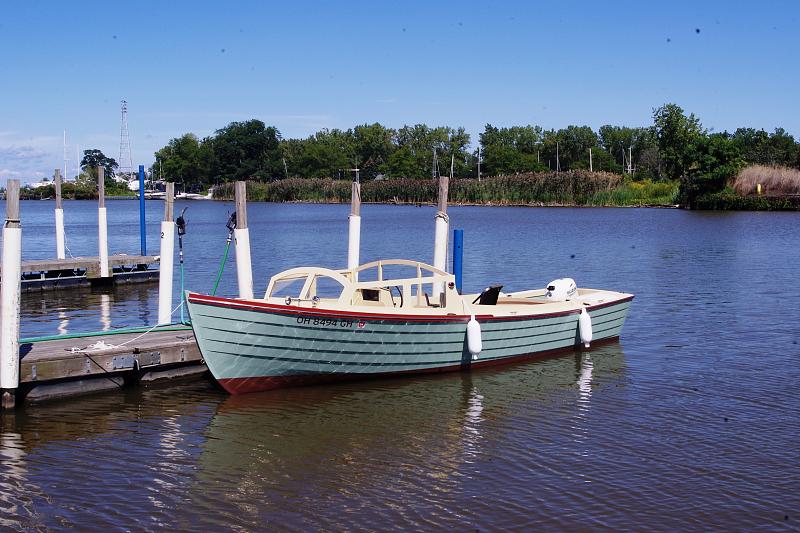
Here is a lovely shot of the boat right before one of its inspections! Tim can't wait to get her onto the waters of Lake Erie for fishing and fun! |
 |
 |
 |
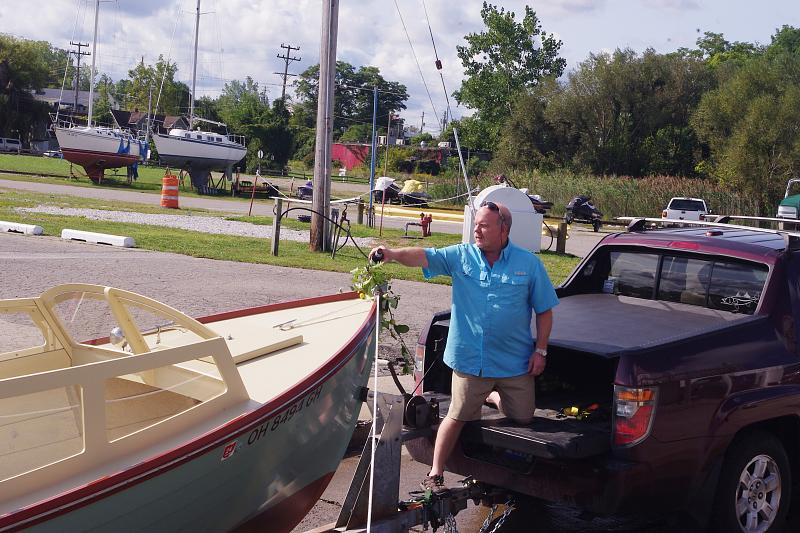
Tim from Ohio finished his Ninigret in September 2021. |
||
|
 |
|